Week 3
Forensic Report: FundacioCIM 3D Printer
Identity of the reporting agency
MDEF
Case identifier
Forensics of the Obsolescence
Identity of the submitter
Albert Vila Bonfill/ Anna Fedele/ Dhrishya Ramadass/ Mihnea Nicolae Patrascu/ Nicolo Baldi/ Qianyin Du
Date of receipt
17/10/2023
Date of report
17/10/2023
Identity and signature of the examiner
Albert , Anna, Dhrishya, Mihnea, Nicolo, Qianyin
Examination
Serial number: 01 150929 1189
Brand: FUNDACIOCIM
Model: BCN3D+
Year: 2015
Weight: 11,6 kg
Colour: BLACK/BLUE
Made in: SPAIN
Forensic Questions
What does it do?
A 3D printer is a device that creates three-dimensional objects by layering material based on a digital design. Using a computer-aided design (CAD) model as a blueprint, the printer adds material layer by layer, whether it's thermoplastic, resin, or metal, to form a solid object. Different printing technologies, such as Fused Deposition Modeling (FDM), Stereolithography (SLA), or Selective Laser Sintering (SLS), dictate the type of material and the layering process, resulting in a tangible product that mirrors the digital design.
How does it work?
The 3D printer works by interpreting a digital 3D model, slicing it into thin horizontal layers using specialized software, and then building the object layer by layer through additive manufacturing. Depending on the technology used, the printer deposits material, such as thermoplastic filament, liquid resin, or metal powder, layer by layer, with each layer fusing to the one below. The material is solidified using various methods like heating, UV curing, or laser sintering, resulting in a three-dimensional object that matches the digital design.
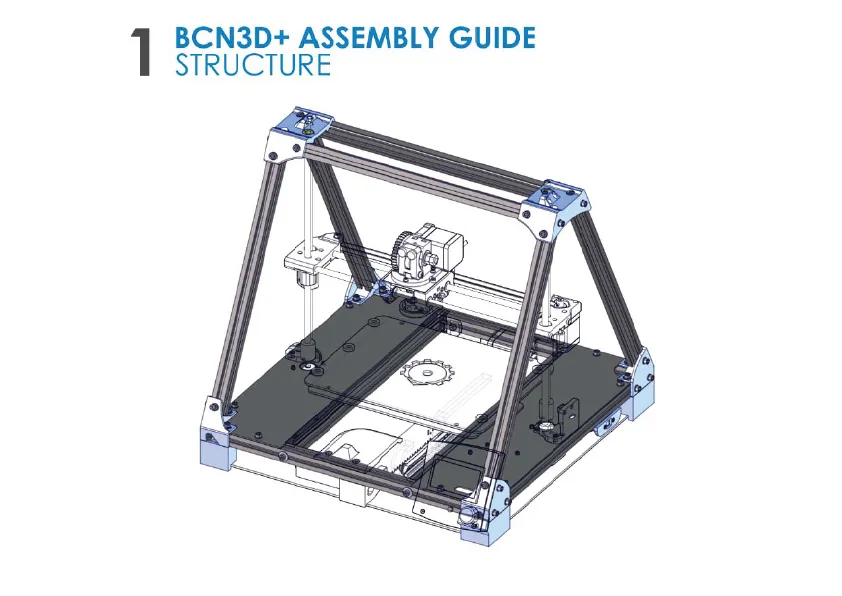
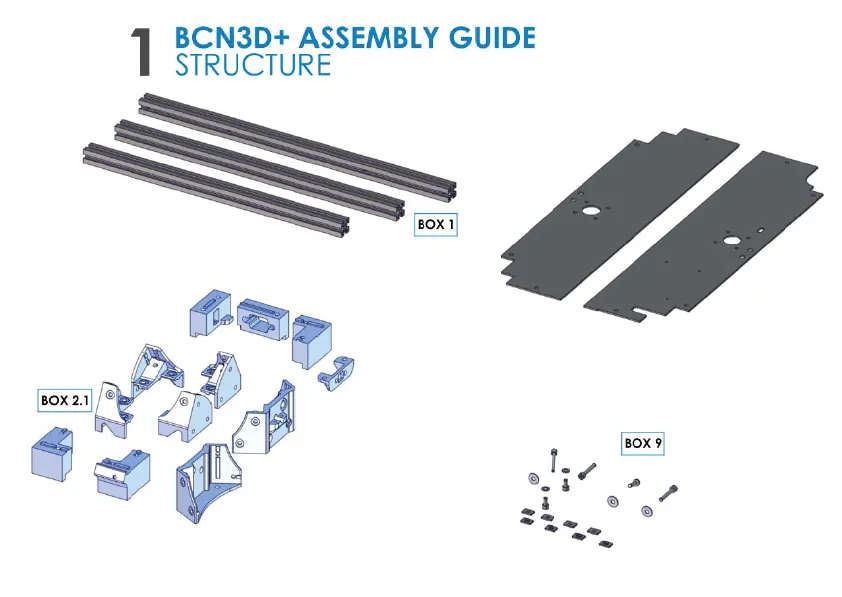
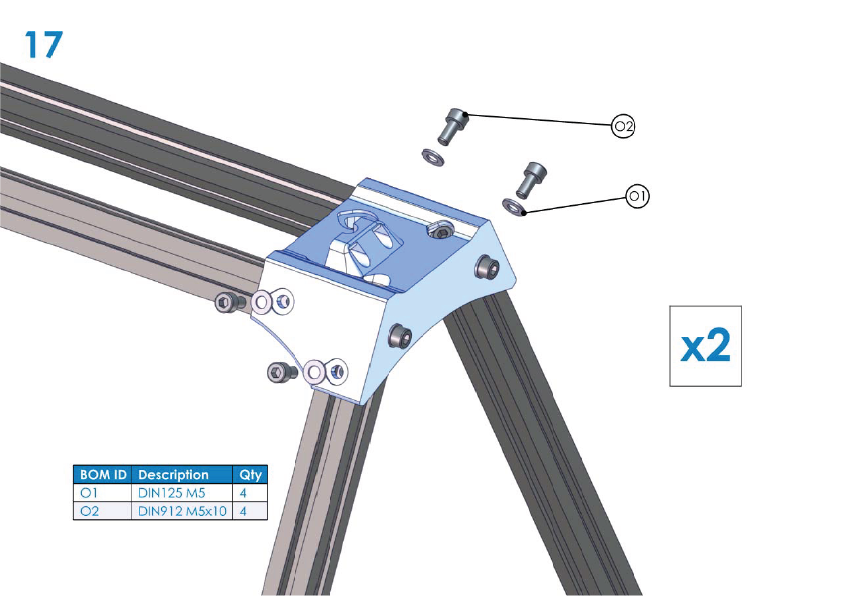
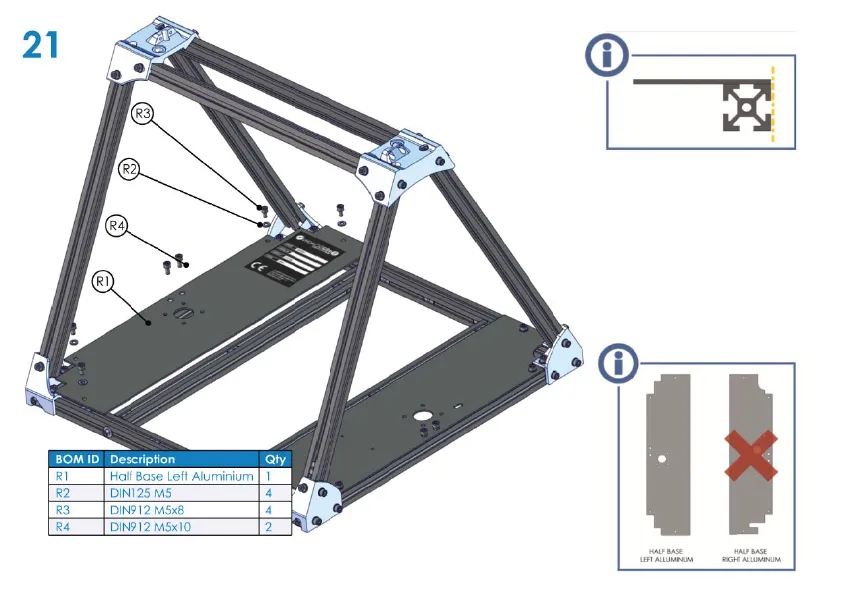
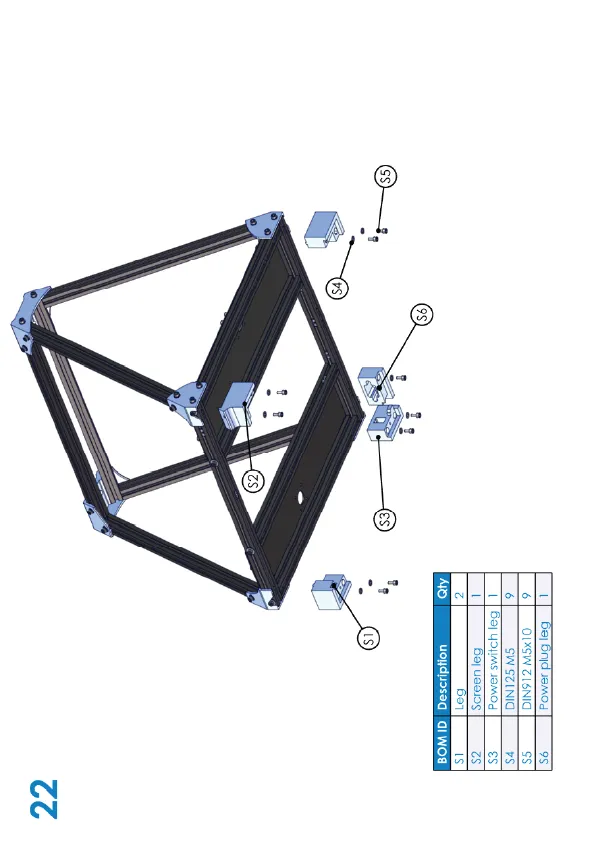
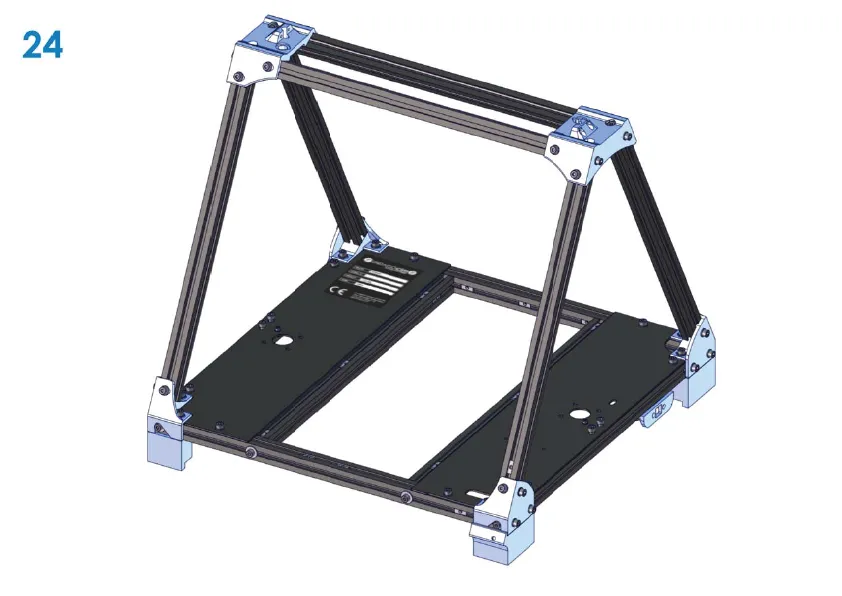
How is it built?
The 3D printer is constructed using a combination of mechanical, electronic, and software components. Mechanically, it features a frame that houses the moving parts, including the print head or extruder, and a build platform. These components are driven by motors, guided by linear rails or rods, ensuring precise movements on the X, Y, and Z axes. Electronically, a main control board processes digital instructions from the slicing software, directing the motors and regulating the temperature of the print head or curing source. Additionally, various sensors monitor conditions like temperature and filament presence, while the software interface allows users to configure settings, load models, and initiate the printing process.
Why it failed, or it wasn’t used anymore?
The 3D printer still functions, but it's an older, unstable model with low accuracy and print quality.
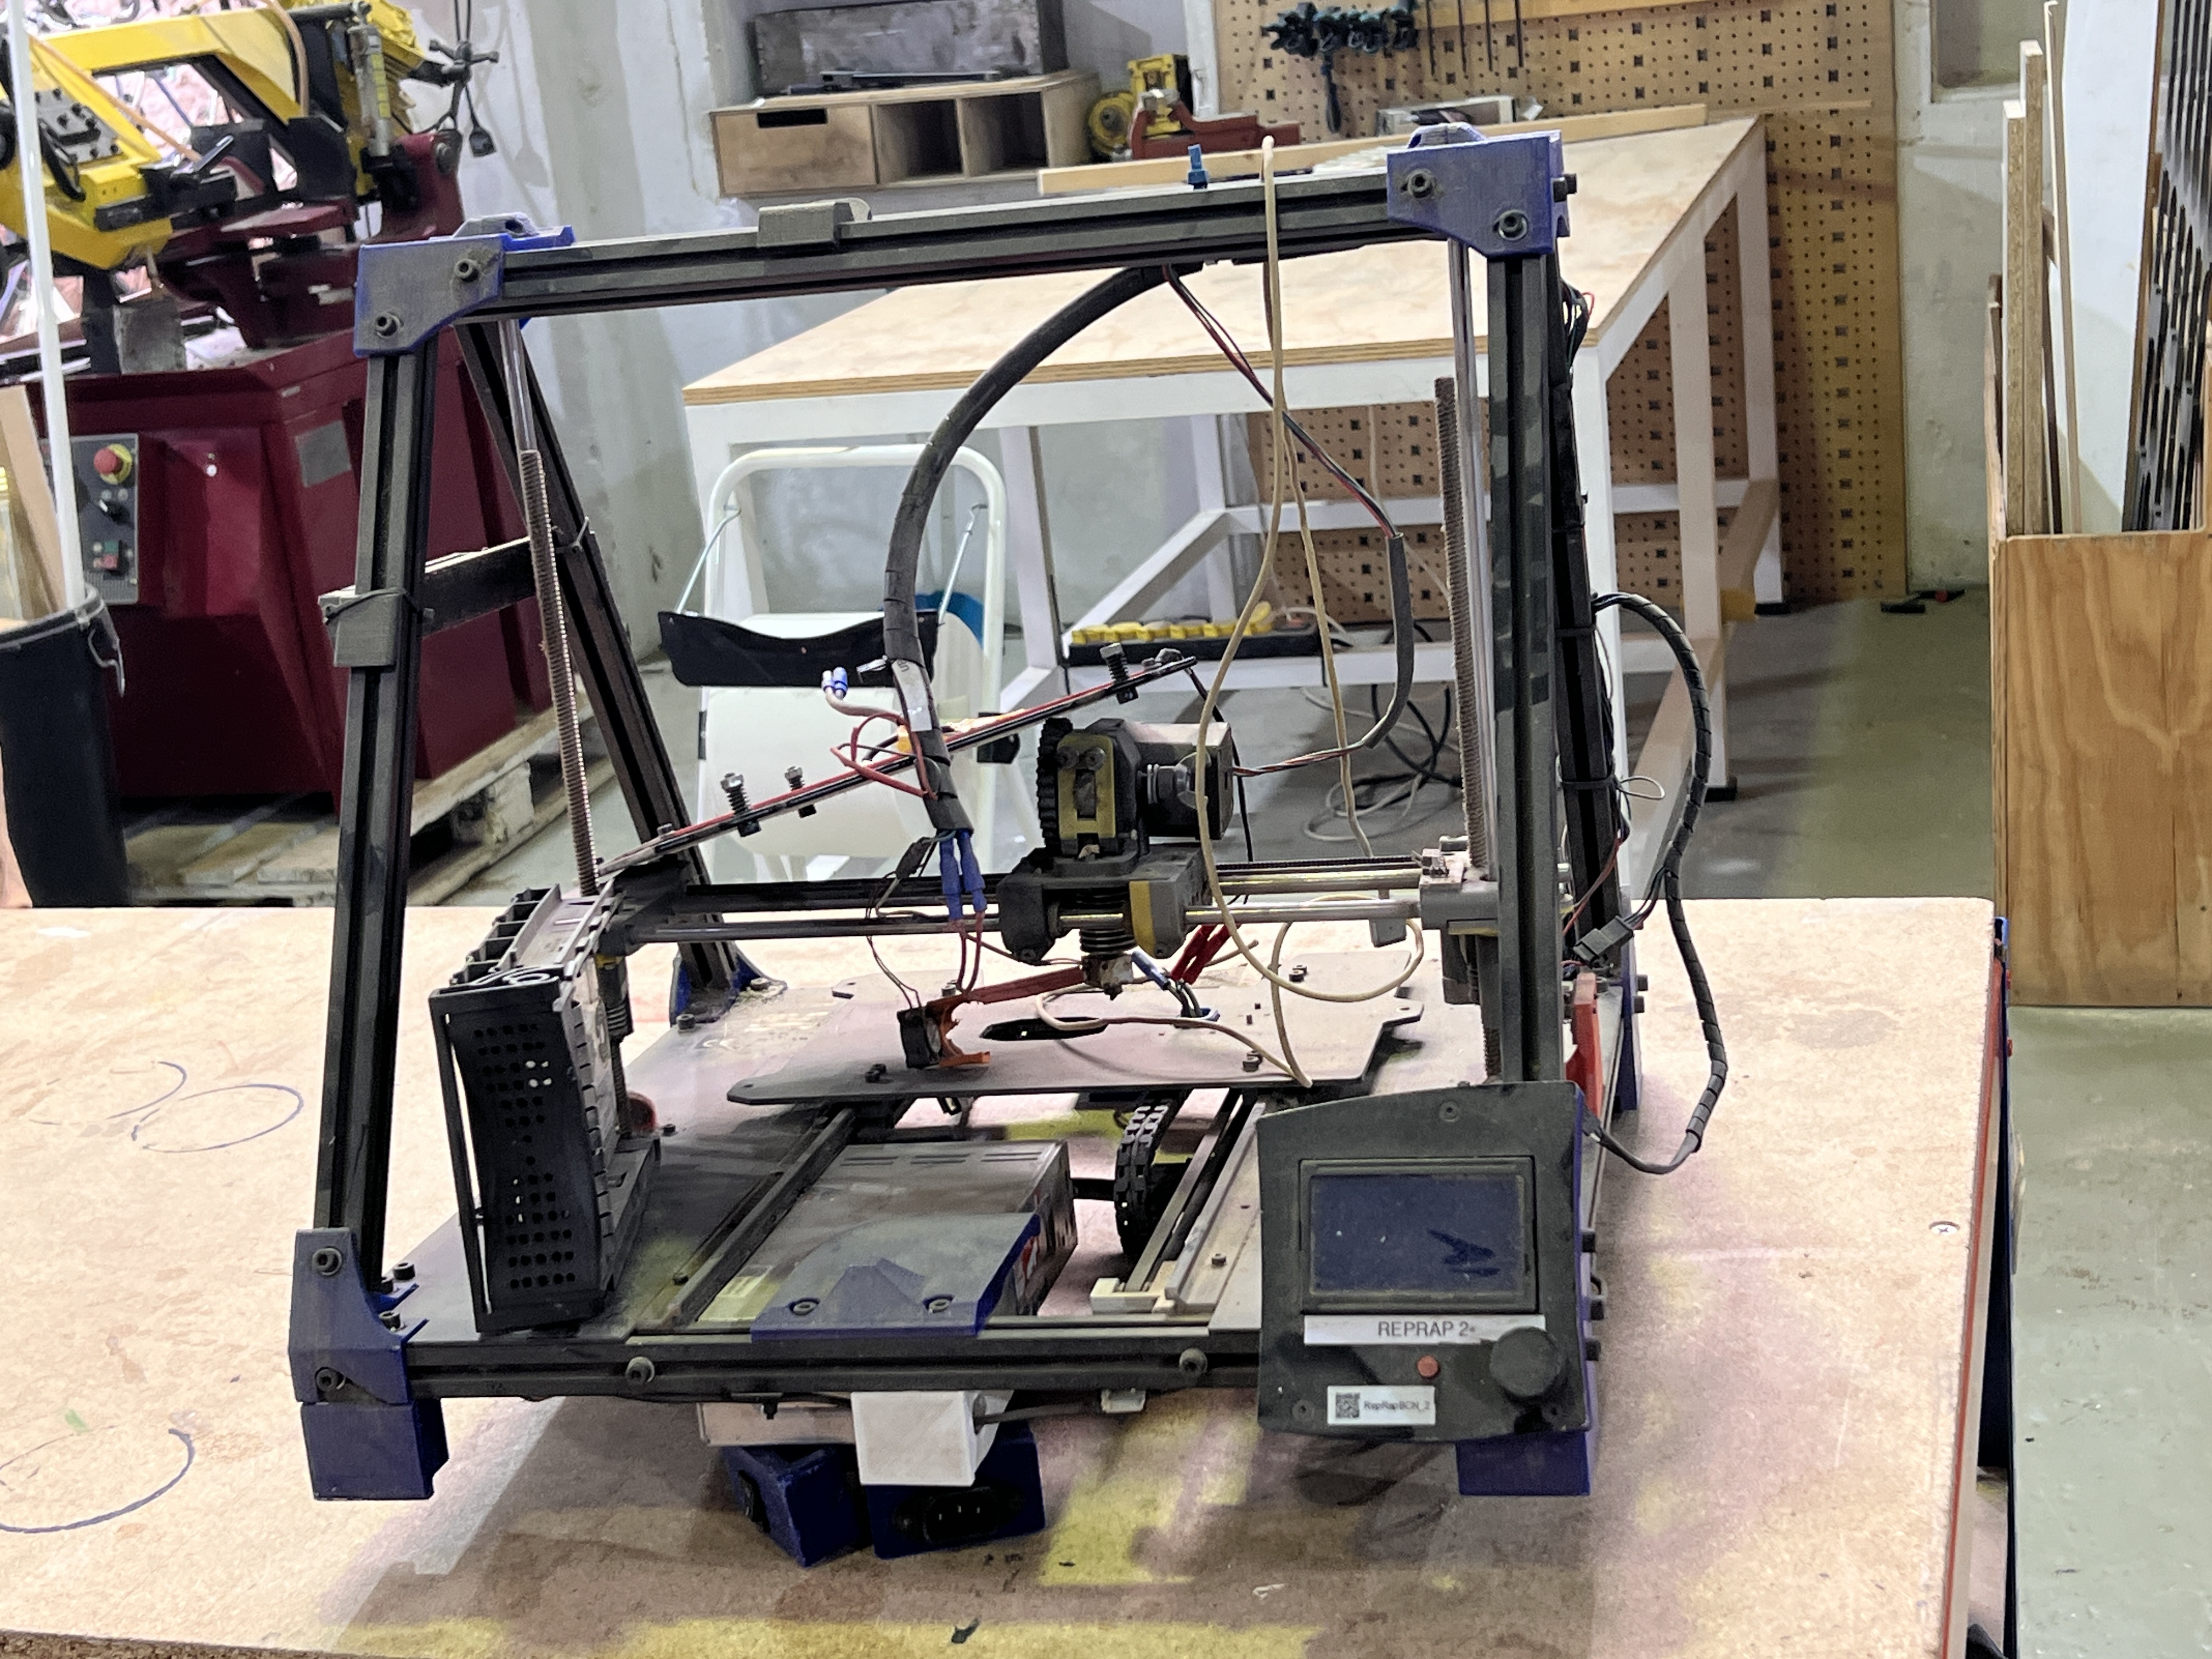
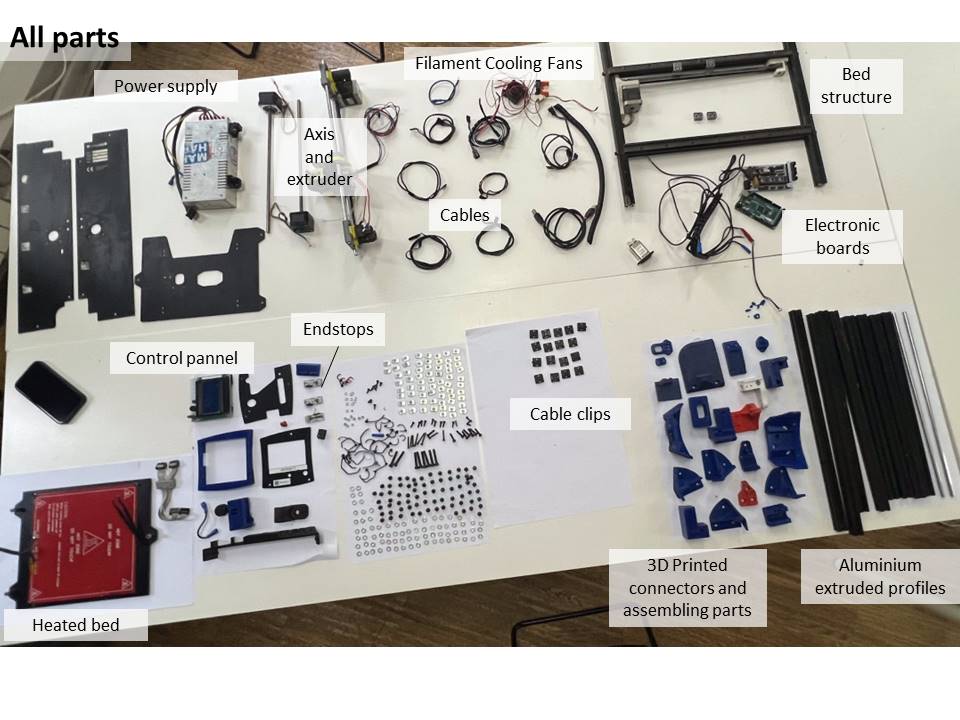
Steps taken
- Cleaned the dust off the printer and brought it to the MDEF room
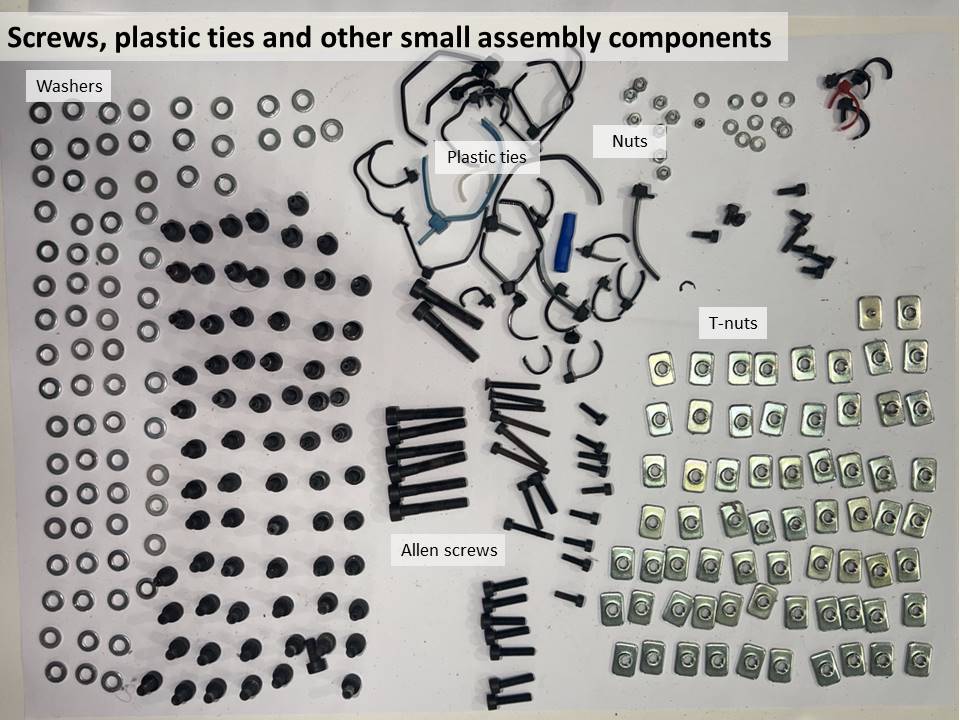
- Disassembled using our toolbox
- Separated into three main parts as follows:
- The plate - Horizontal surface that also gets heated and can be moved in all directions and where the plastic is printed on;
- The structural part - The part that supports the entire printing machine;
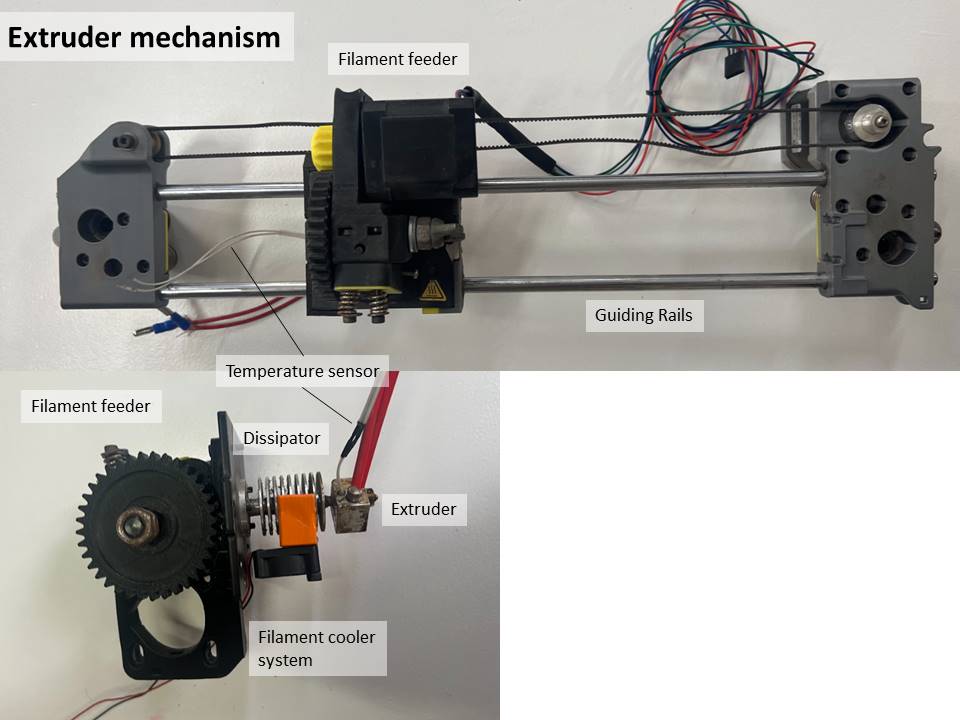
- The extruder - Contains the motors to print 3D filament;
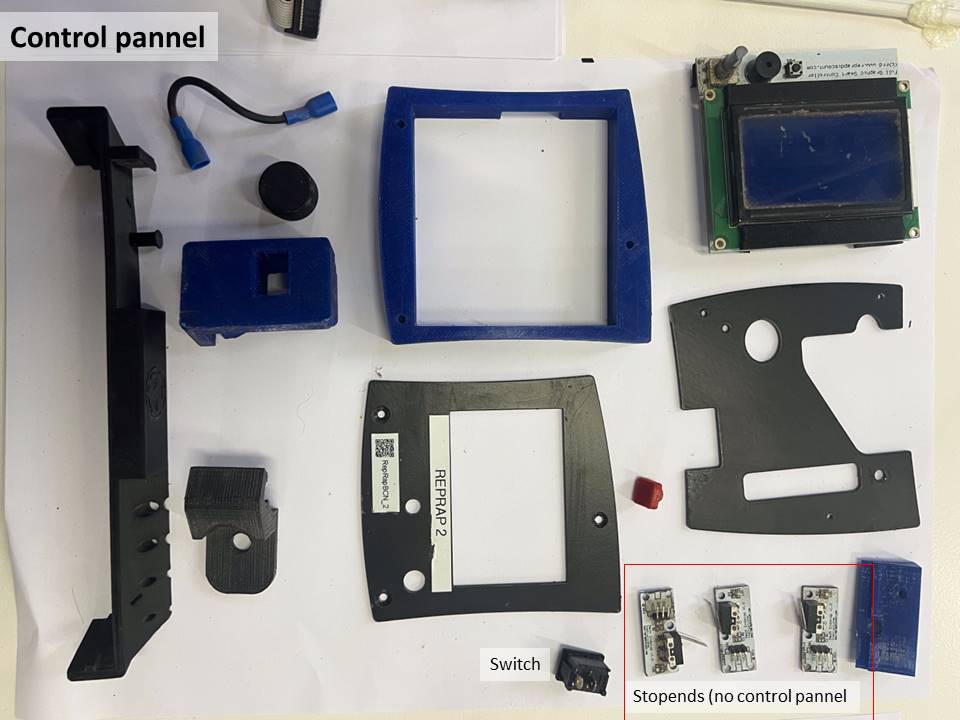
- Laid out all parts individually and documented.
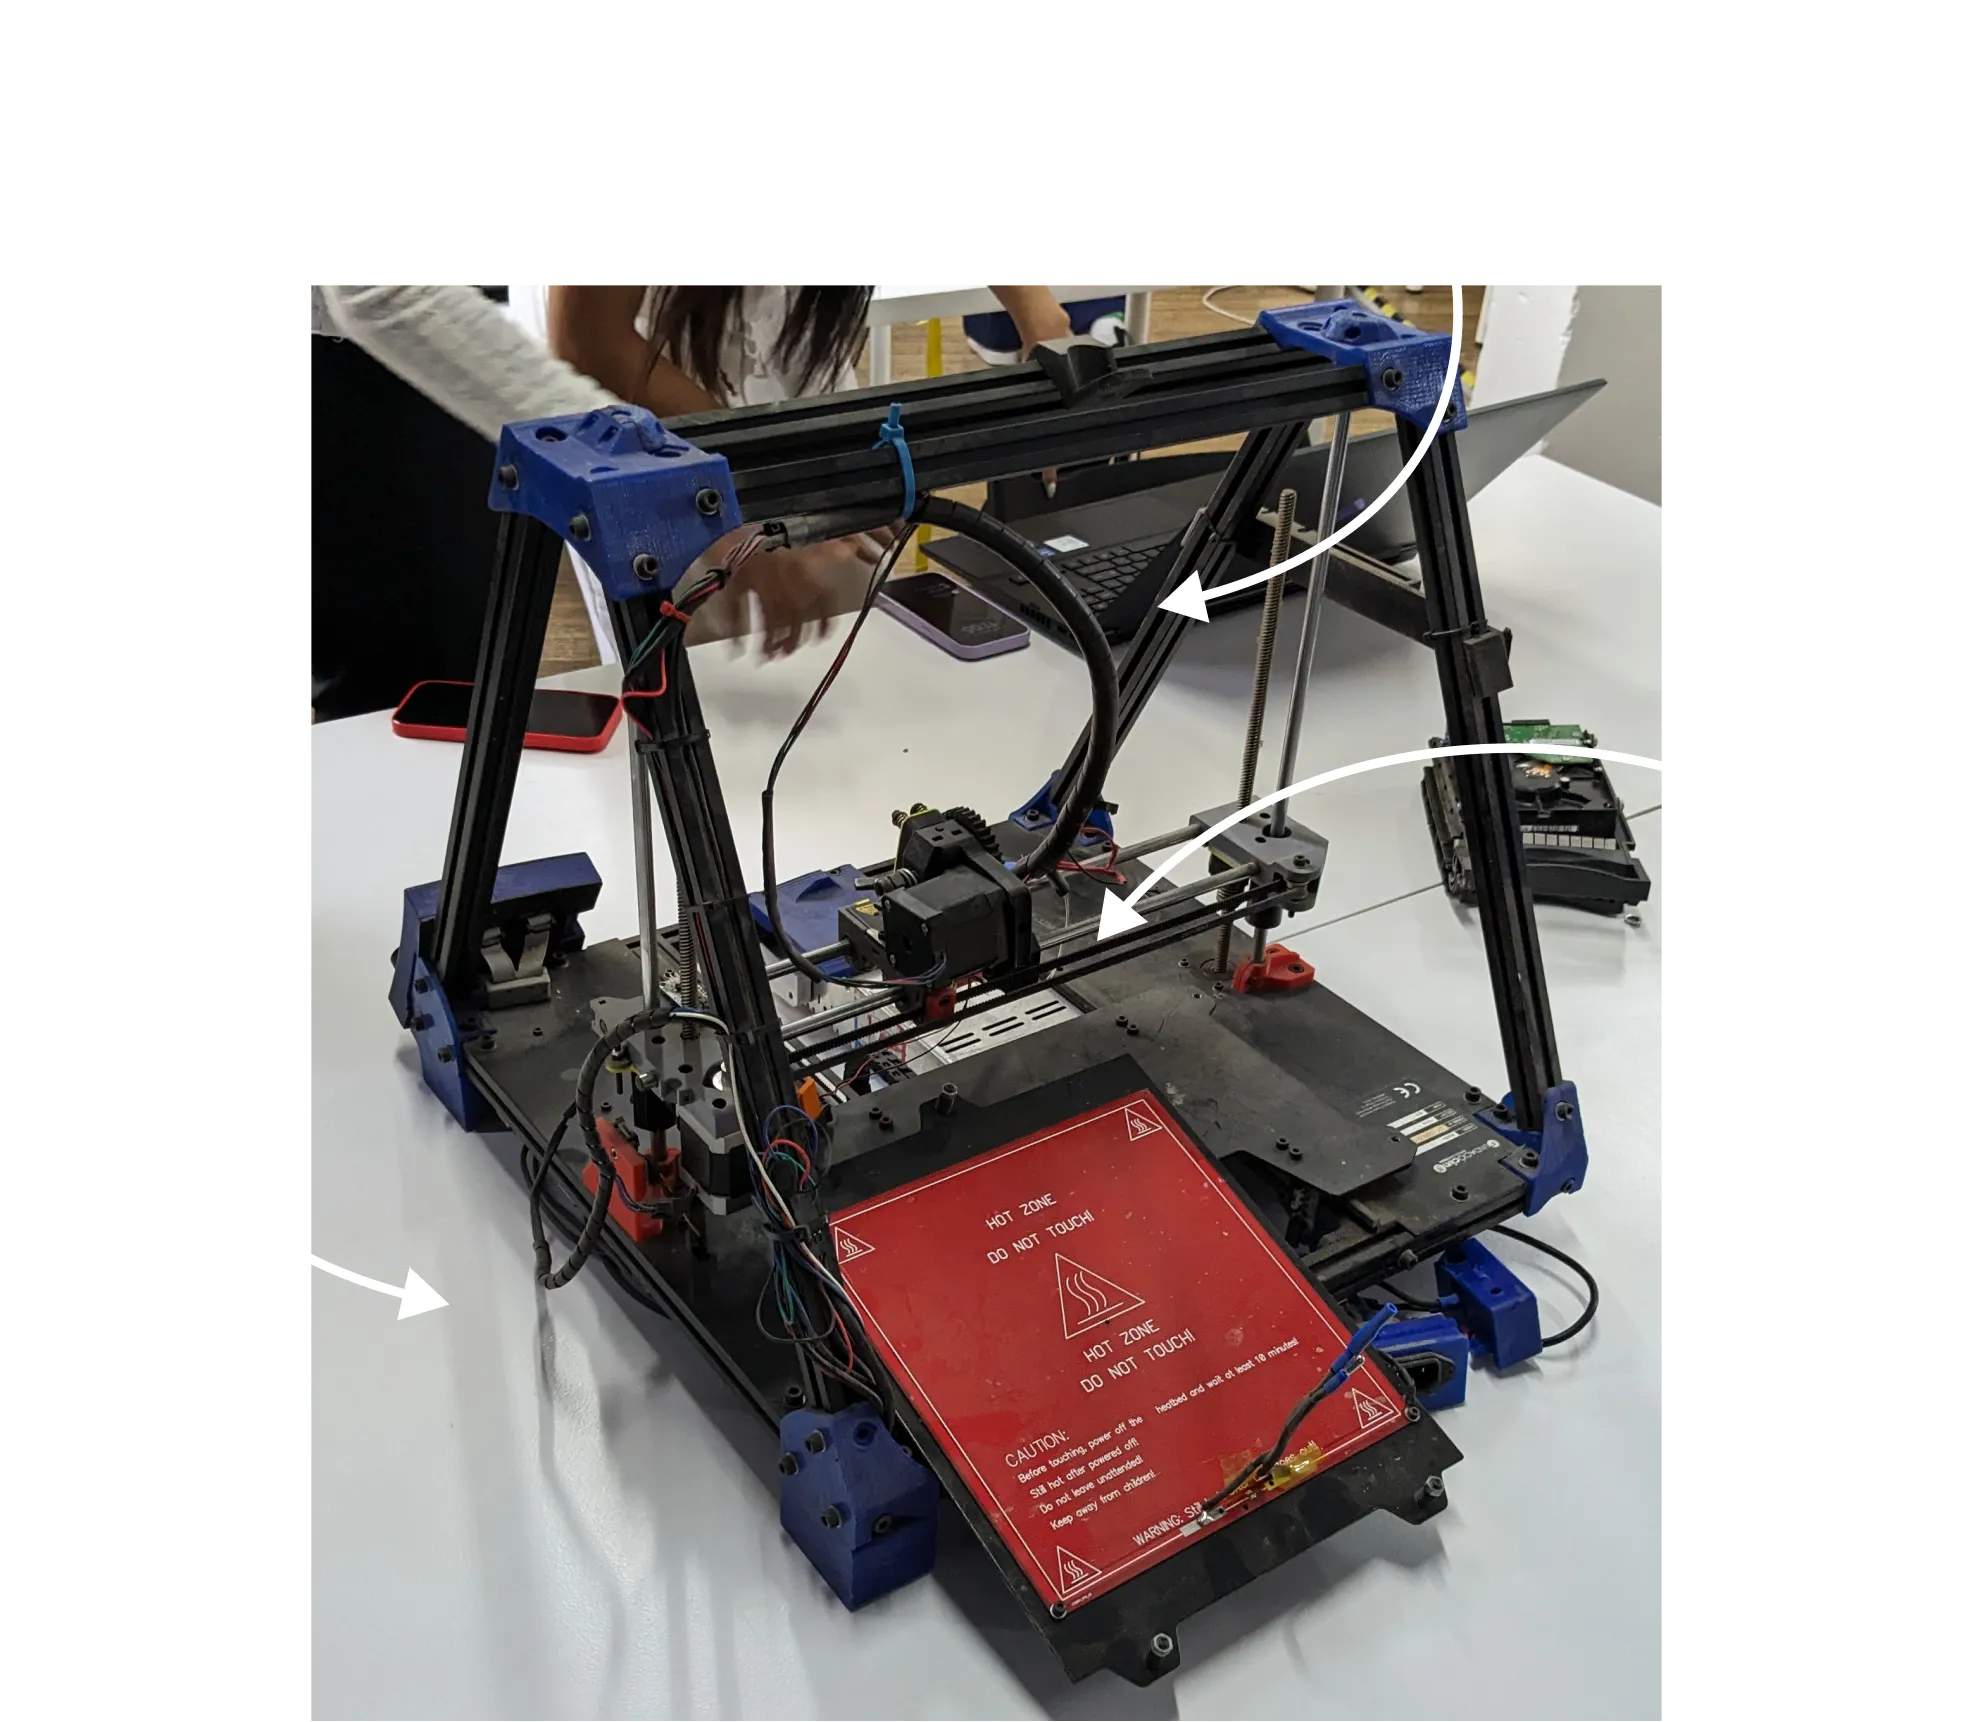
Image Gallery
How it came together


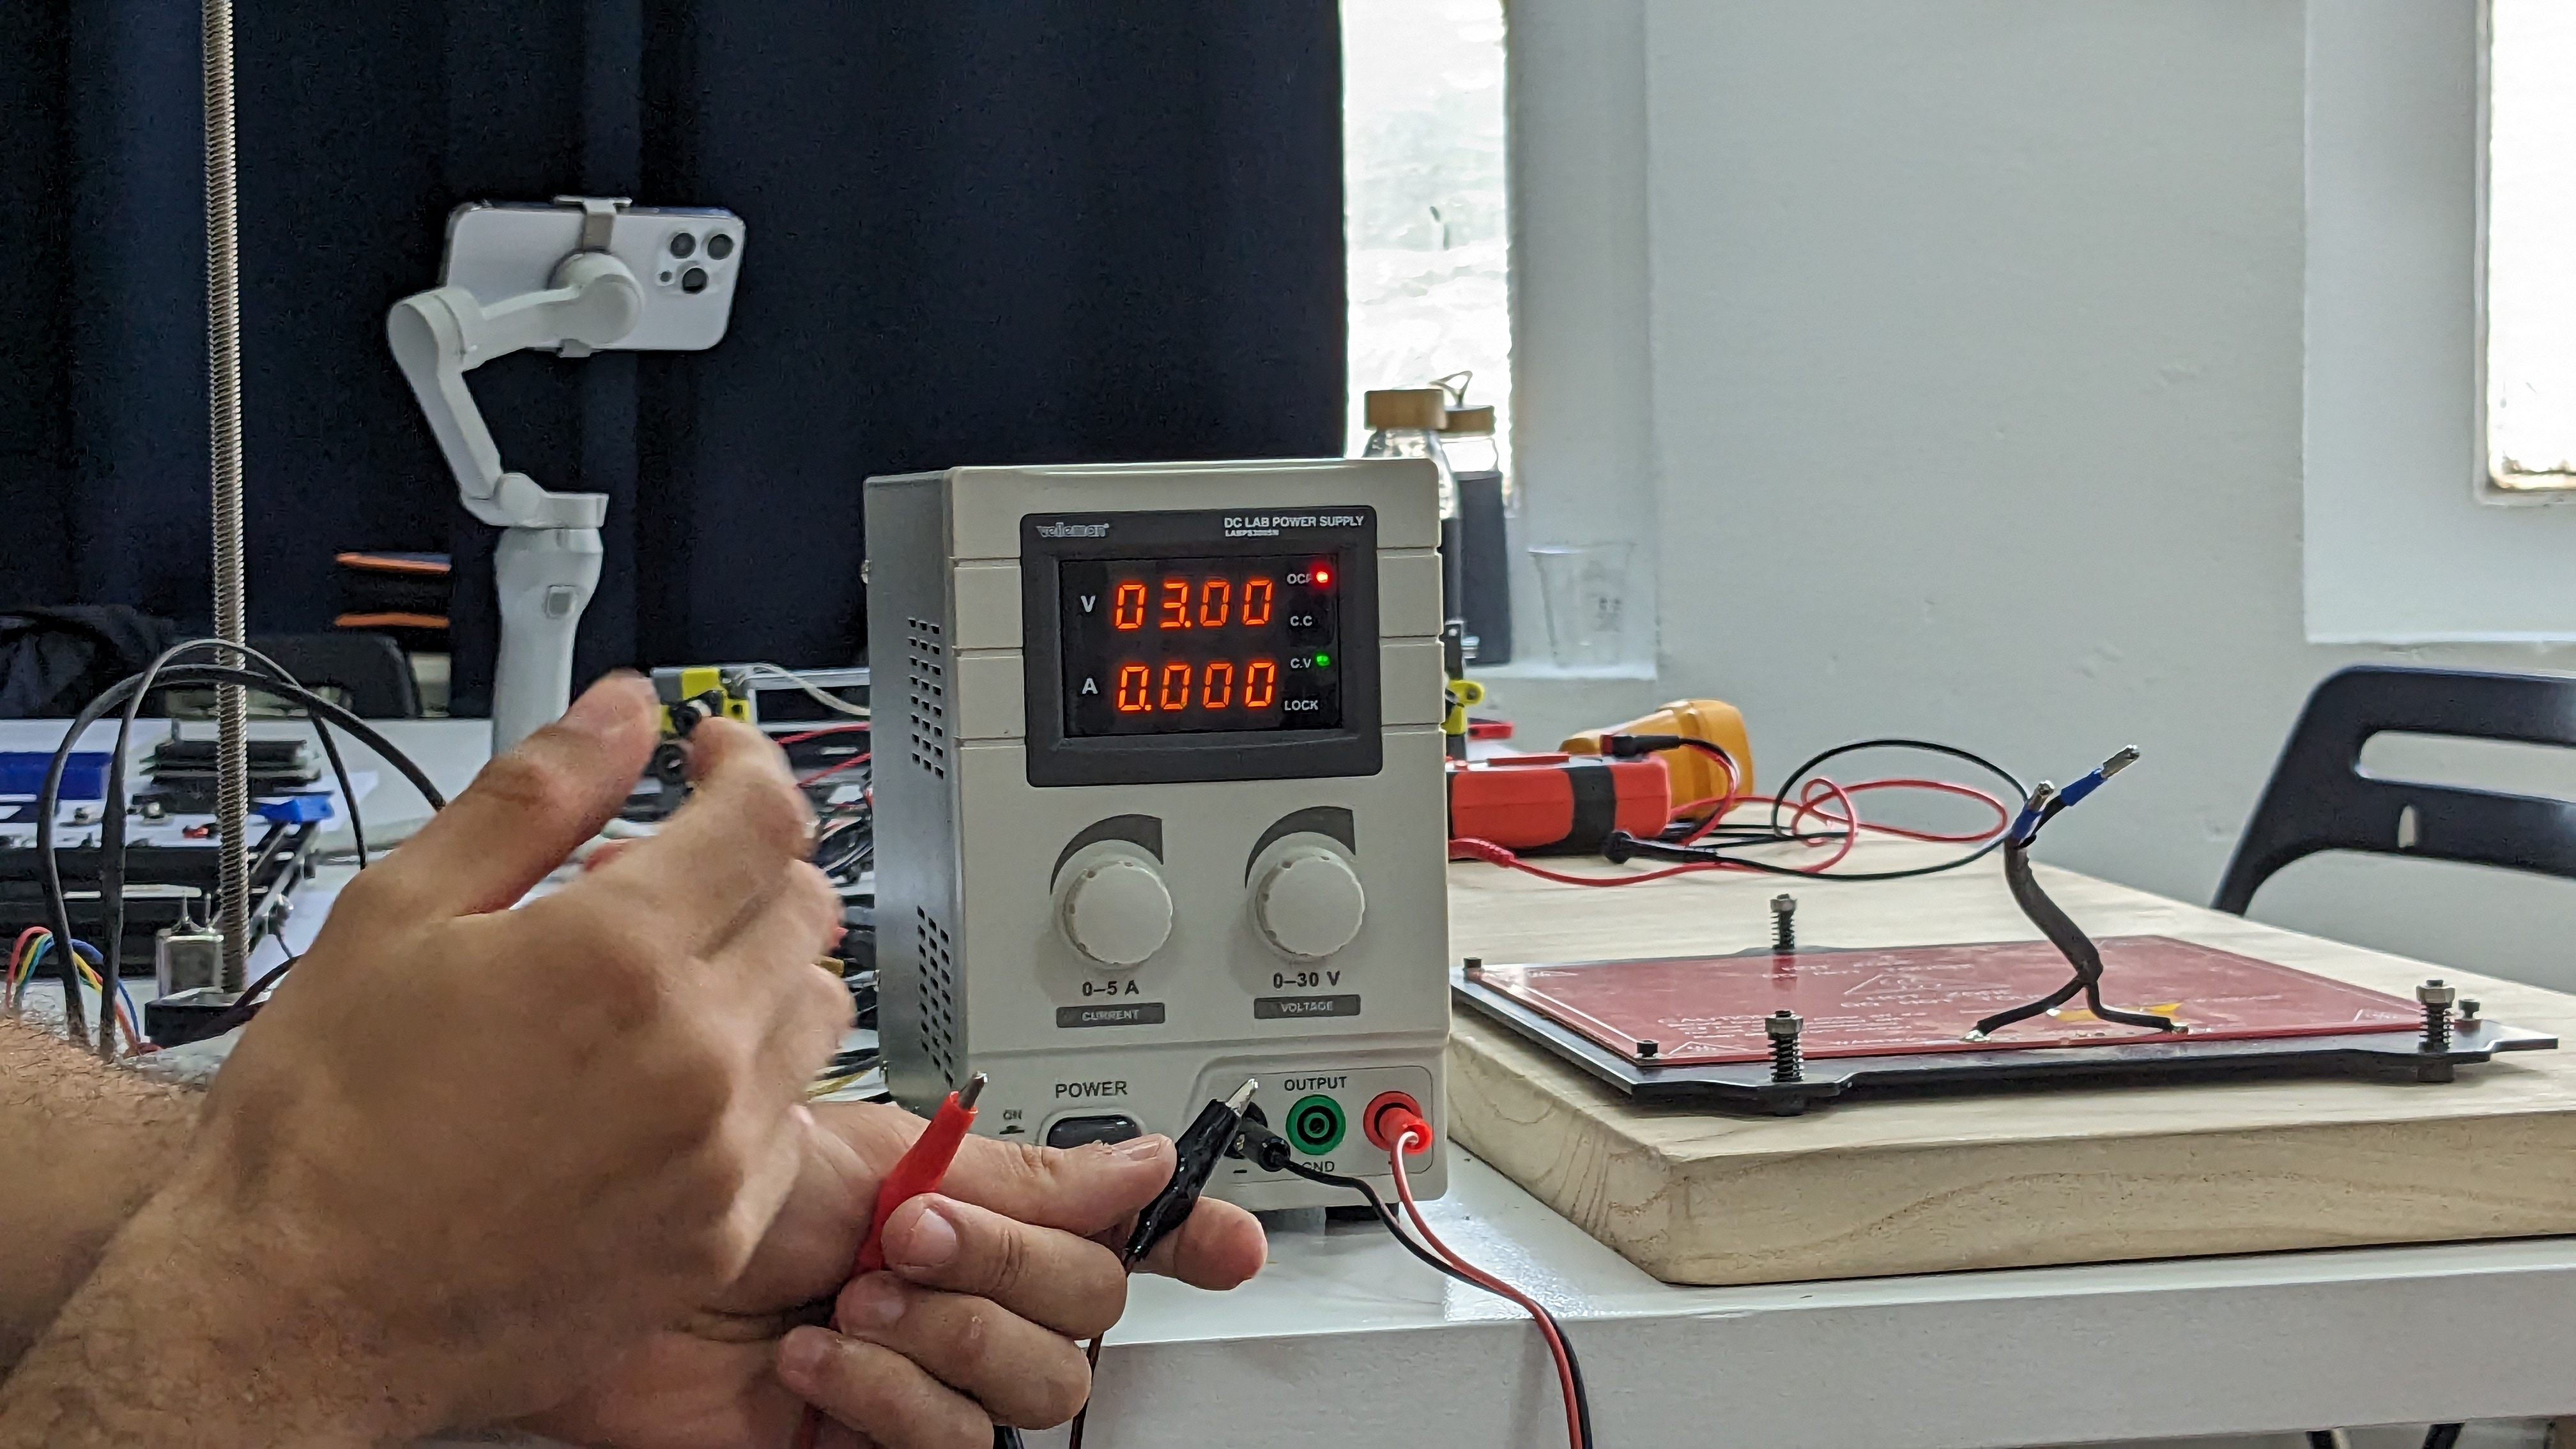
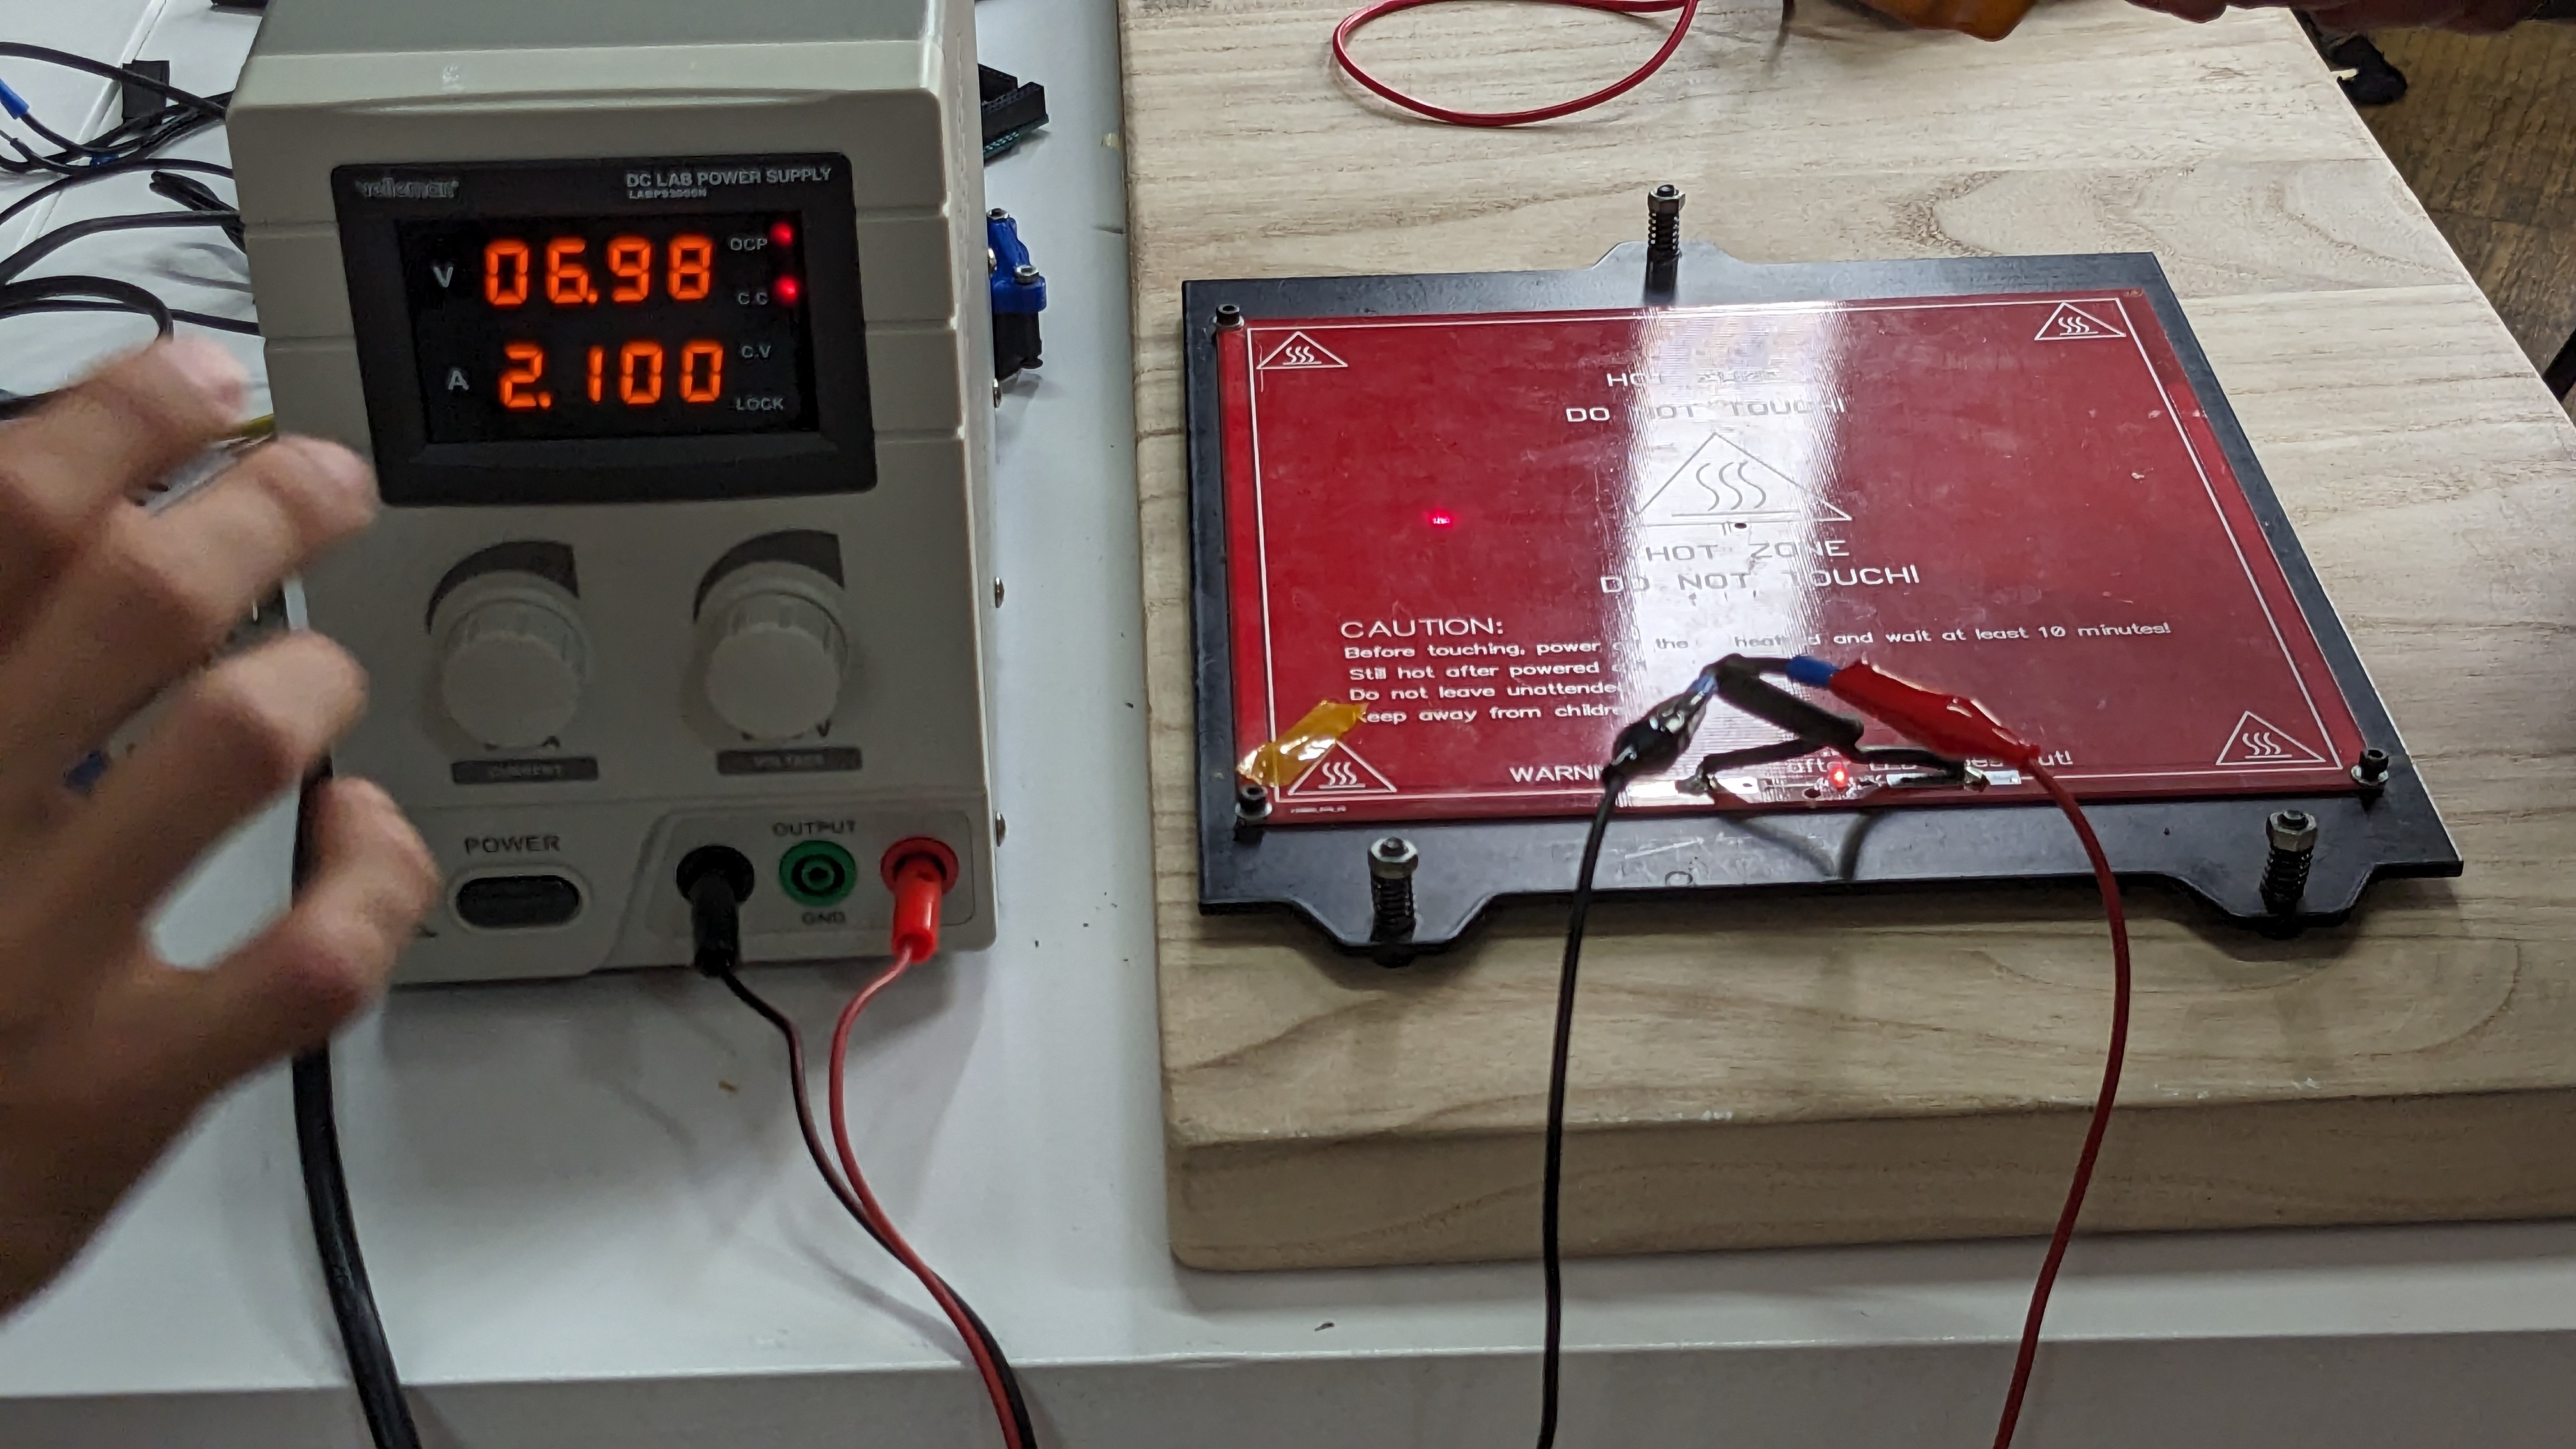
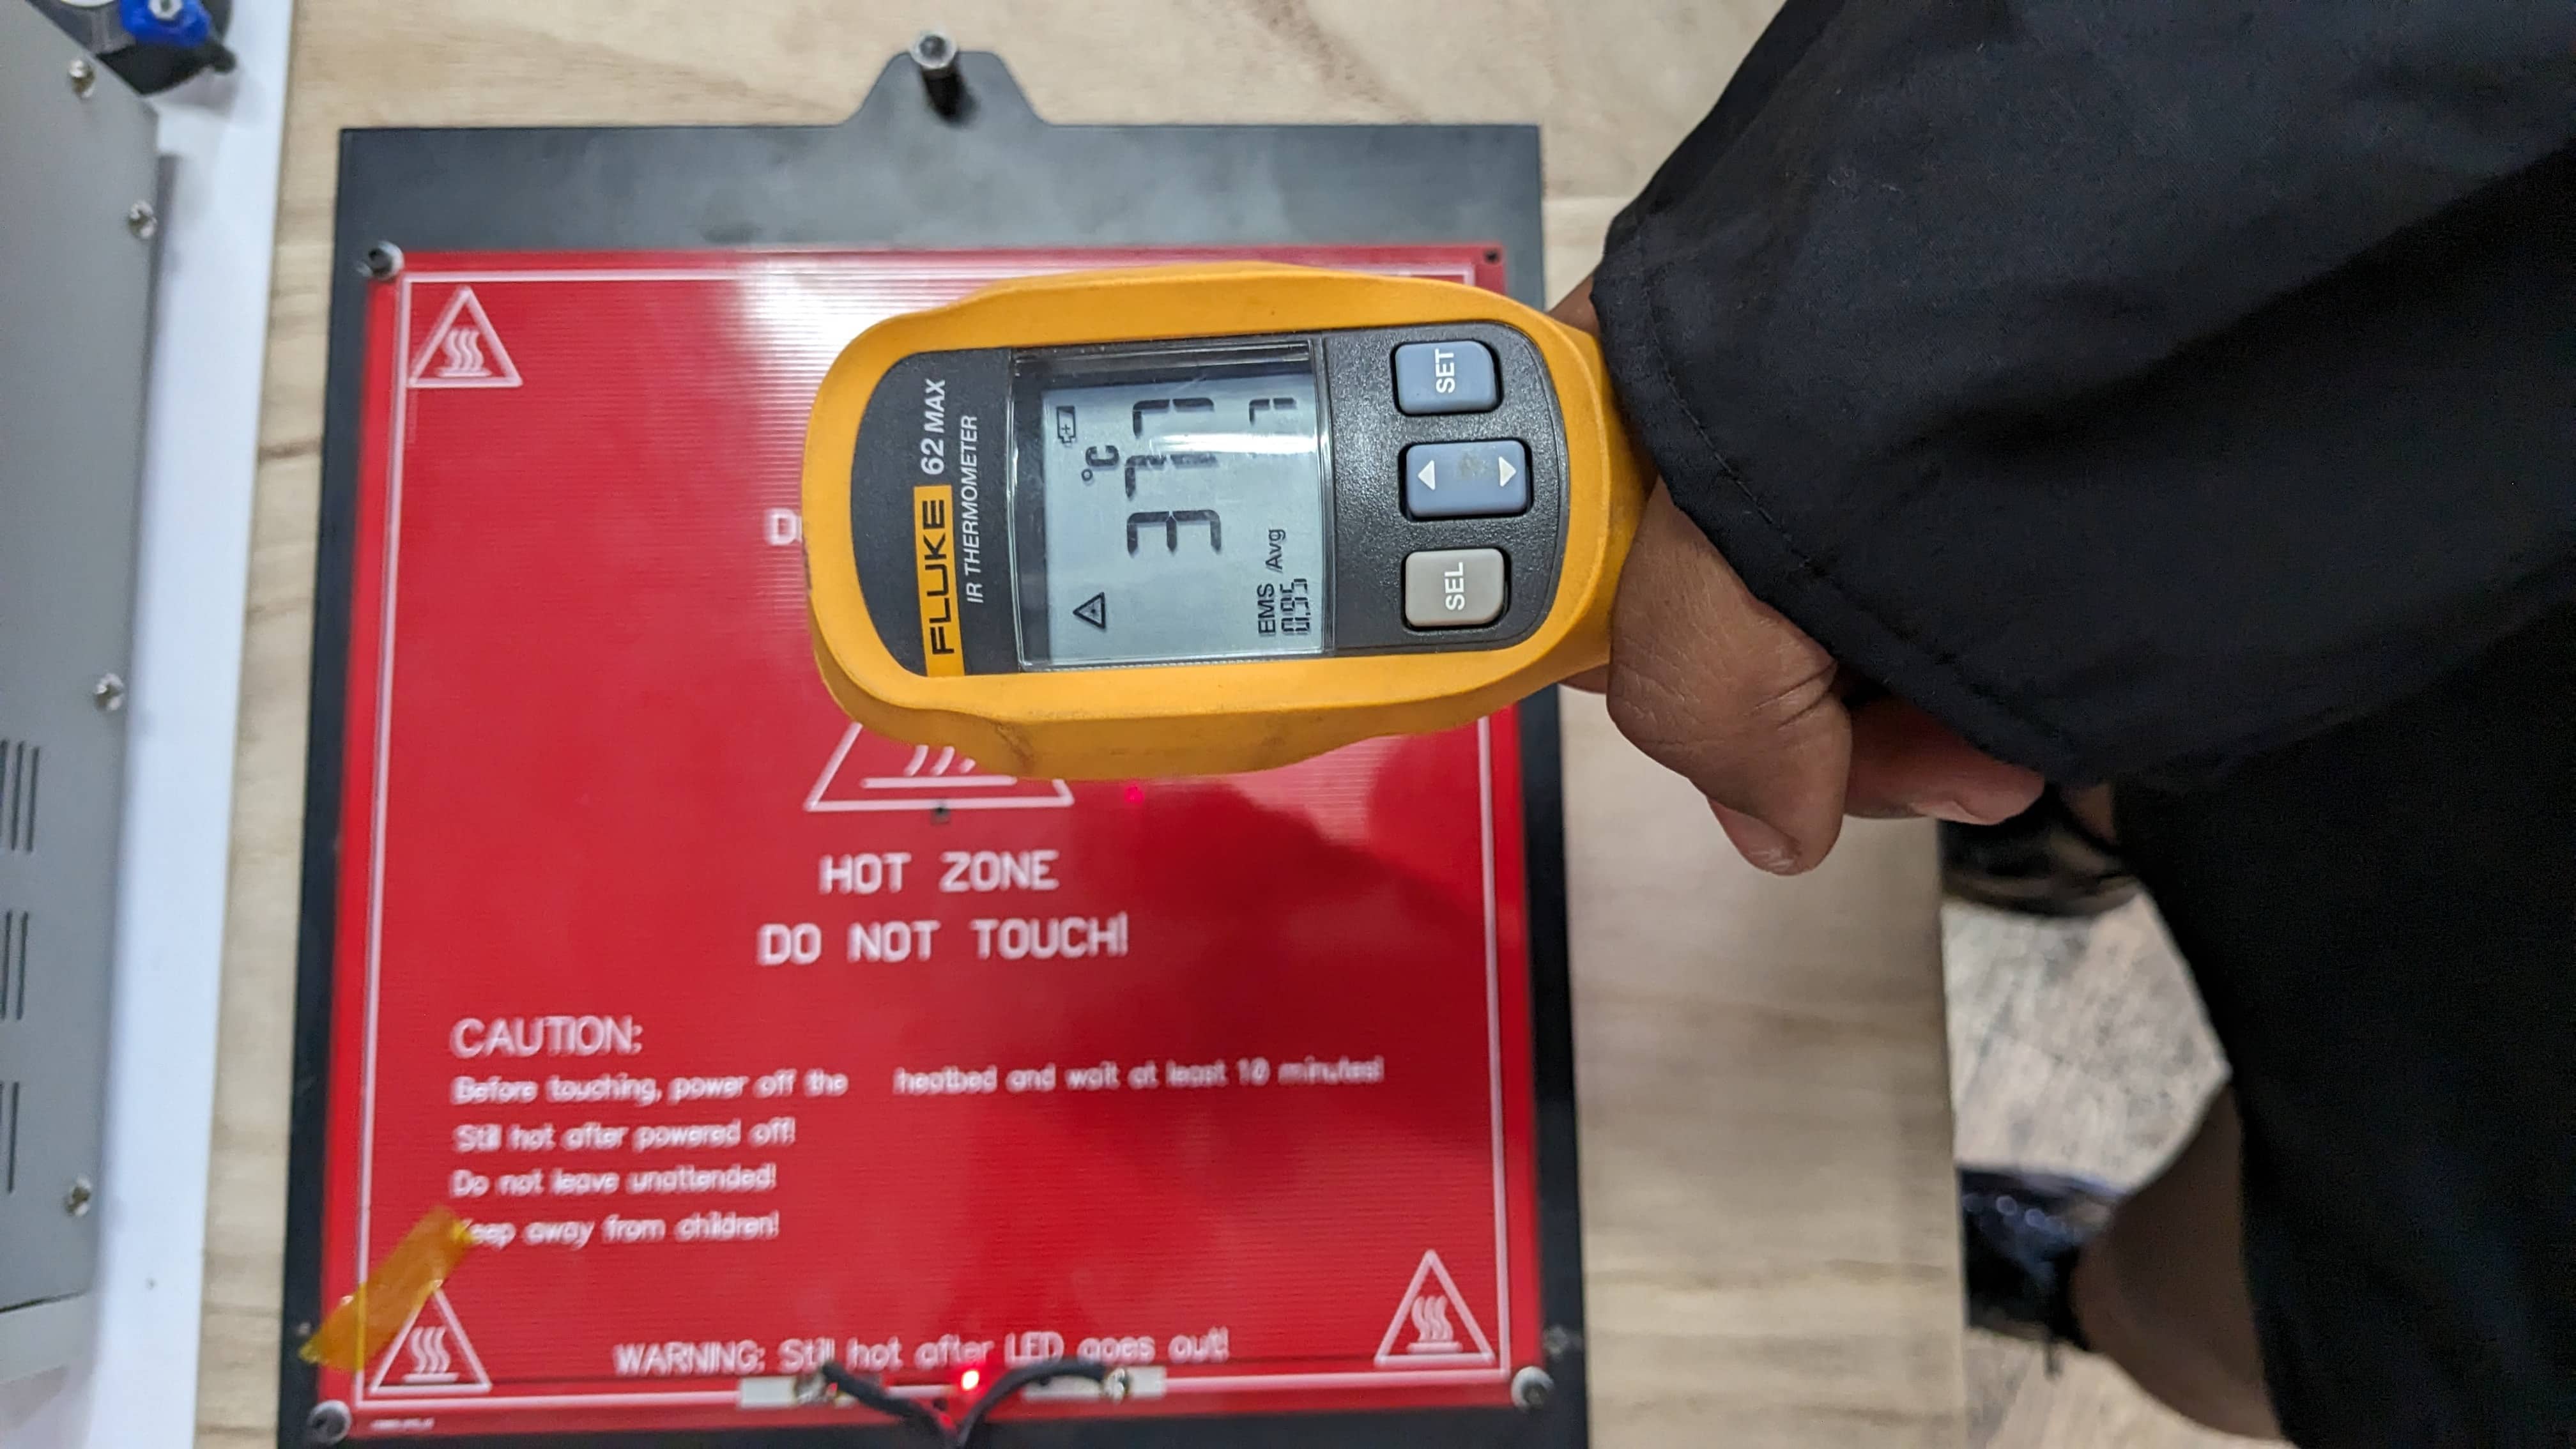
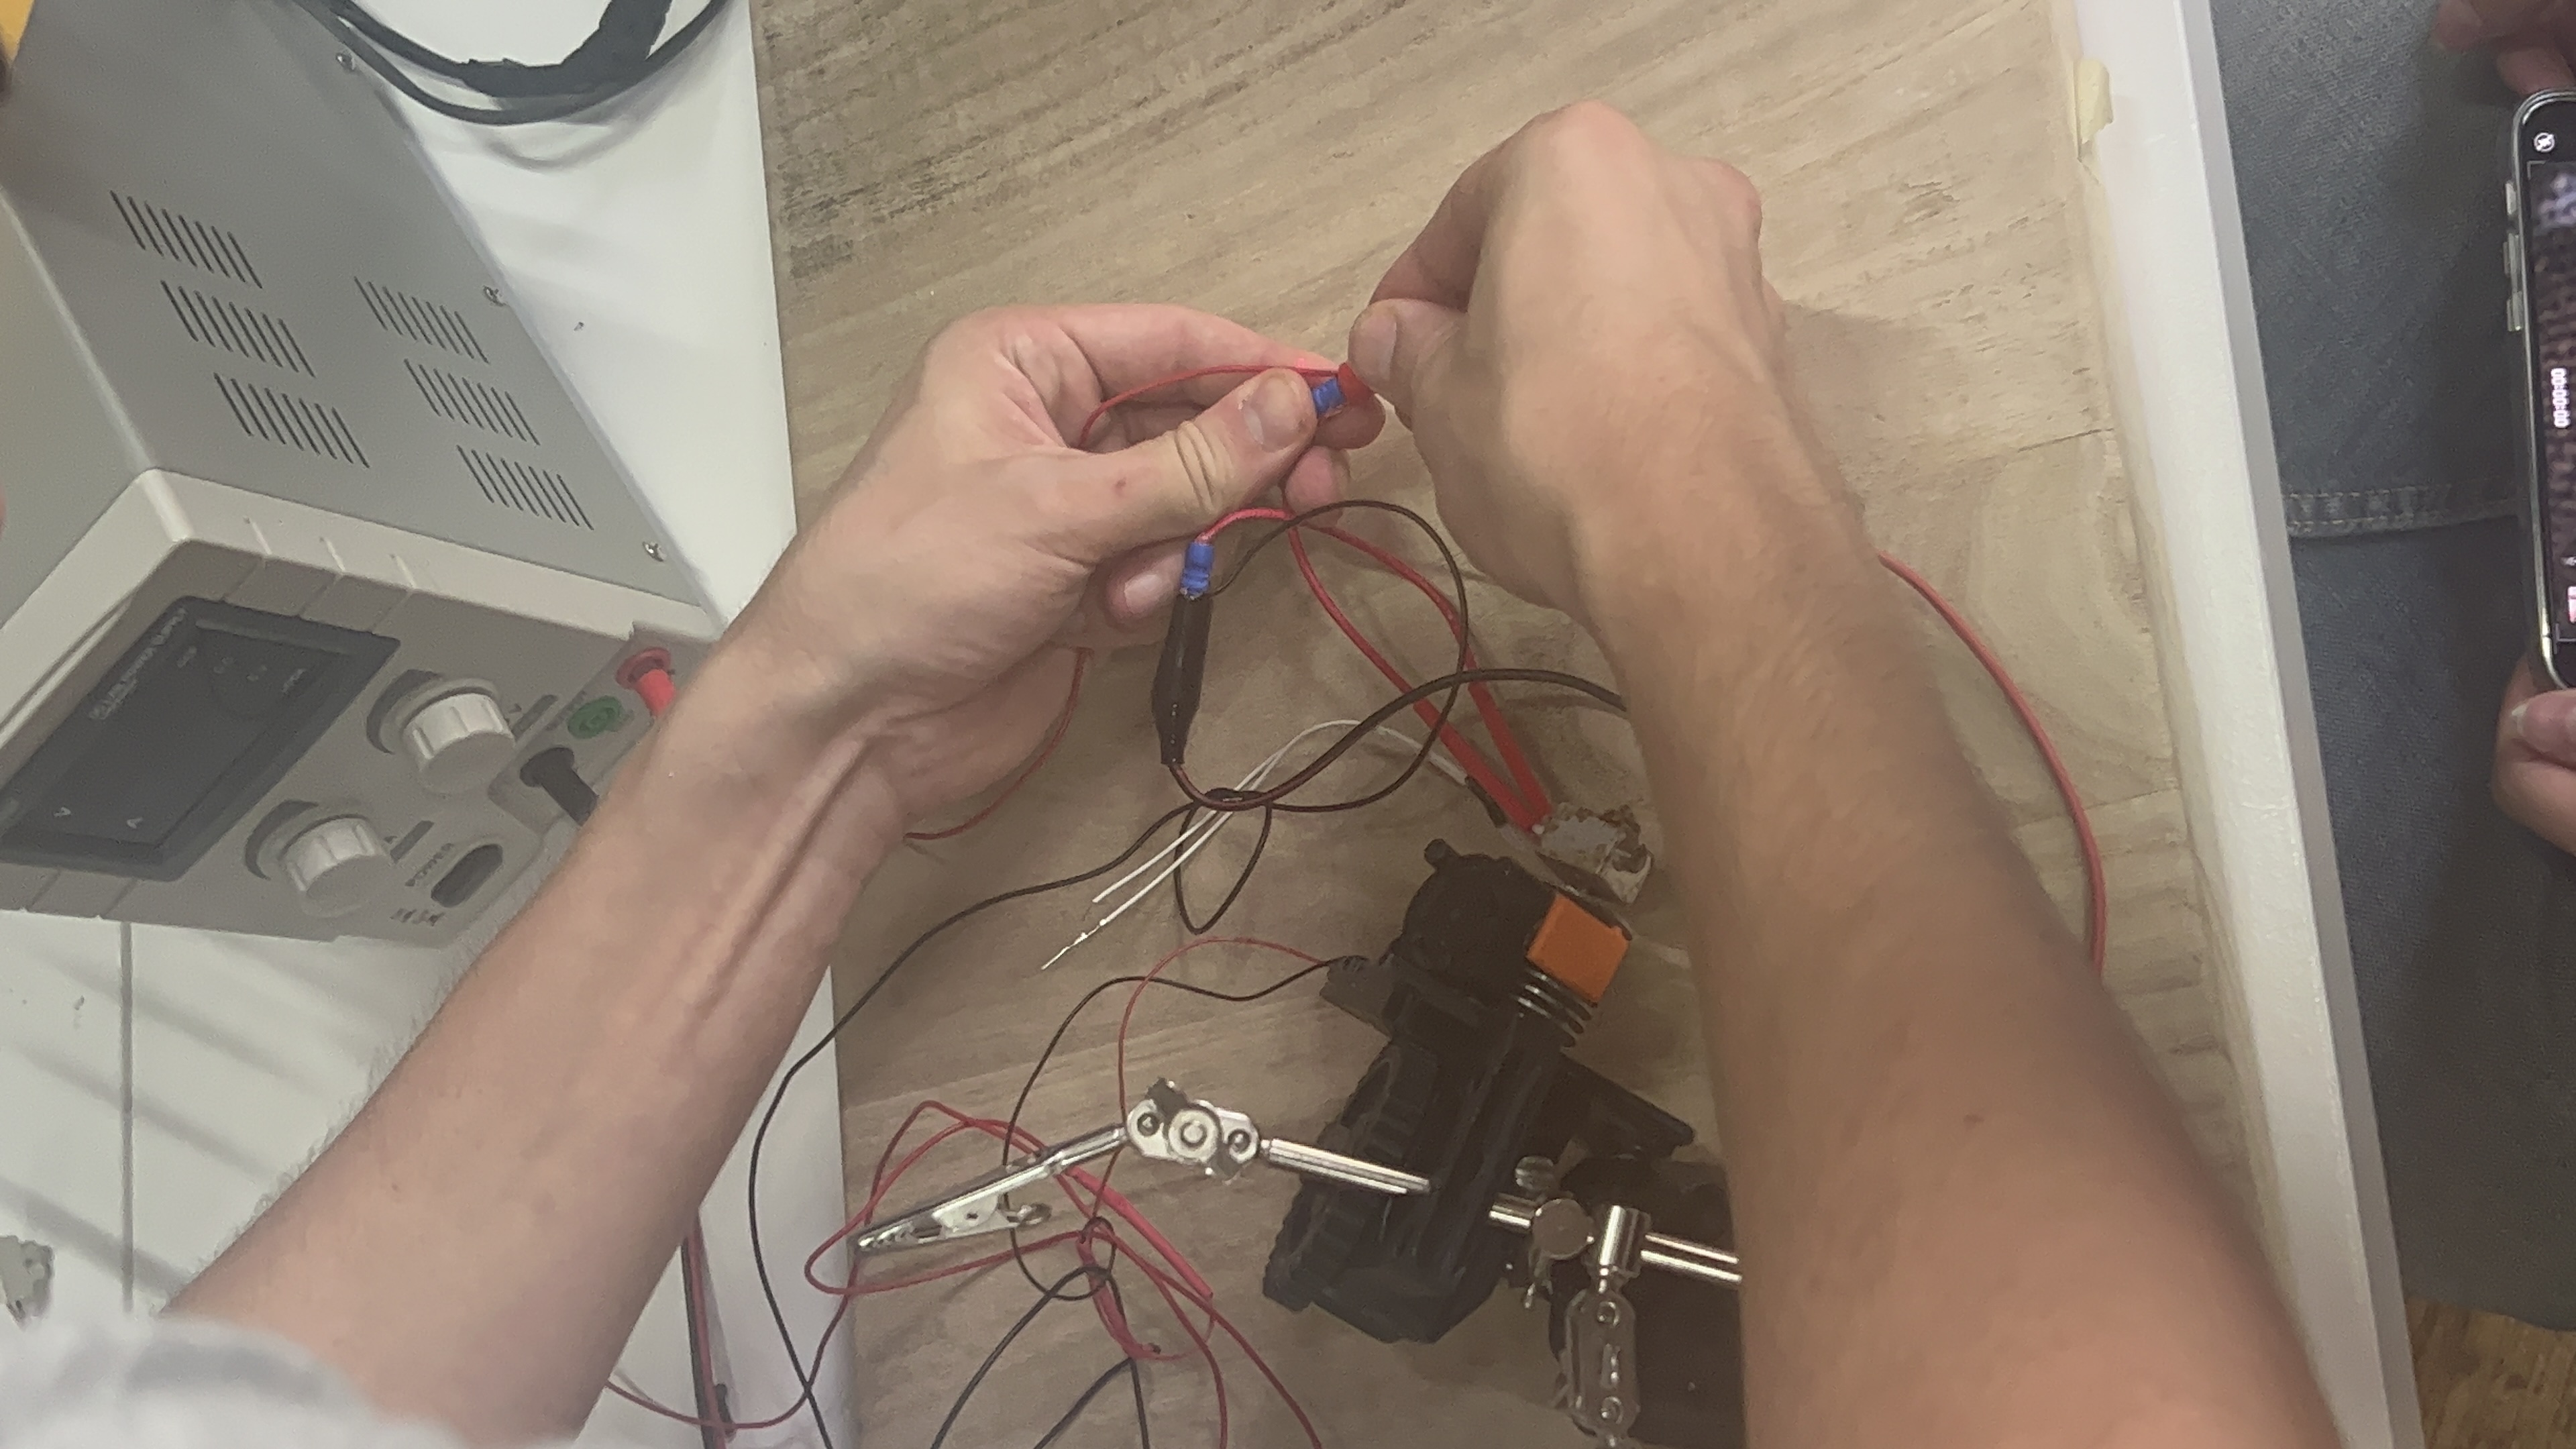
Powering things up
After the disassembly process, we meticulously examined each individual component. Utilizing a precision lab power supply and a high-resolution multimeter, we conducted comprehensive tests to determine the optimal voltage required for each component's functionality.
Results
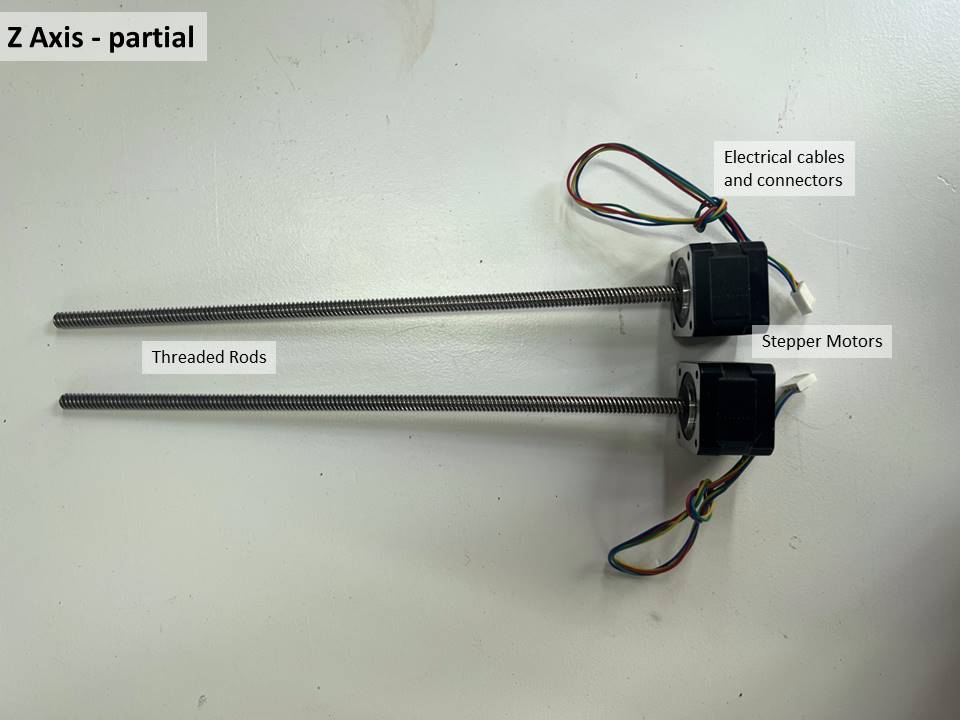
How many motors did we find inside?
Five motors - they are used to move the extruder in the three axis to permit drawing in 3D space.
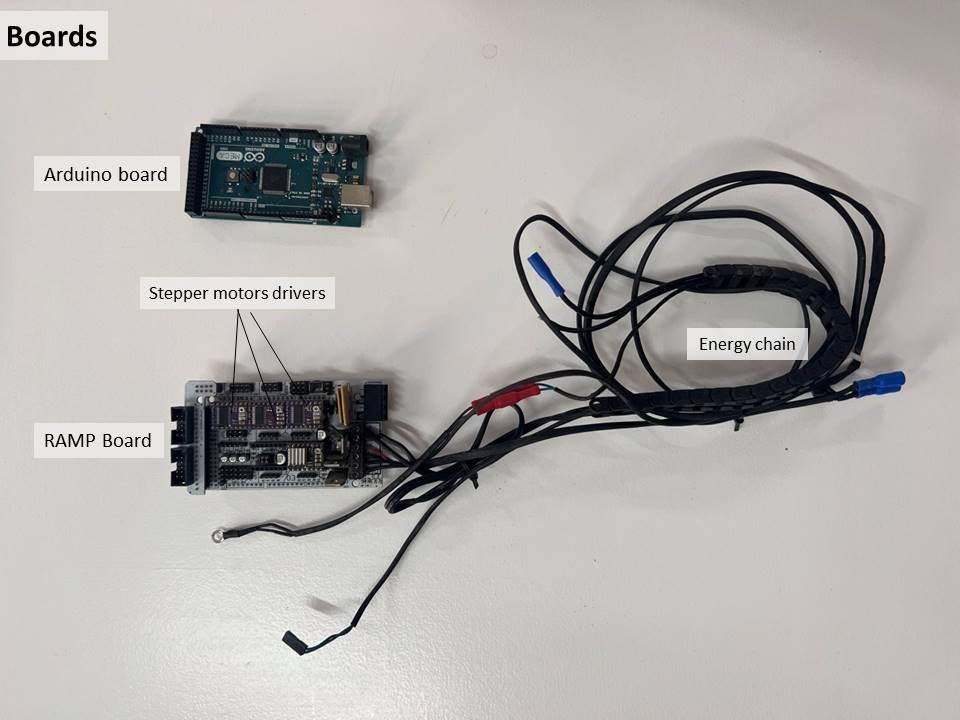
Does it contain a computer or microcontroller?
Yes, an Arduino board and a RAMPS.
Did you found any sensors?
Yes, temperature sensors.
Conclusions
What did you learn?
- How a 3D printer is assembled
- How a 3D printer works
- How to power up each component individually
- Fundamental electronics
- How a step motor works
What surprised you?
- The number of components, screws and pieces the printer had
- The fact that we can make the extruder work with just 3 components
- How easy and repareable it is
- How much the 3D technology has improved since 2015
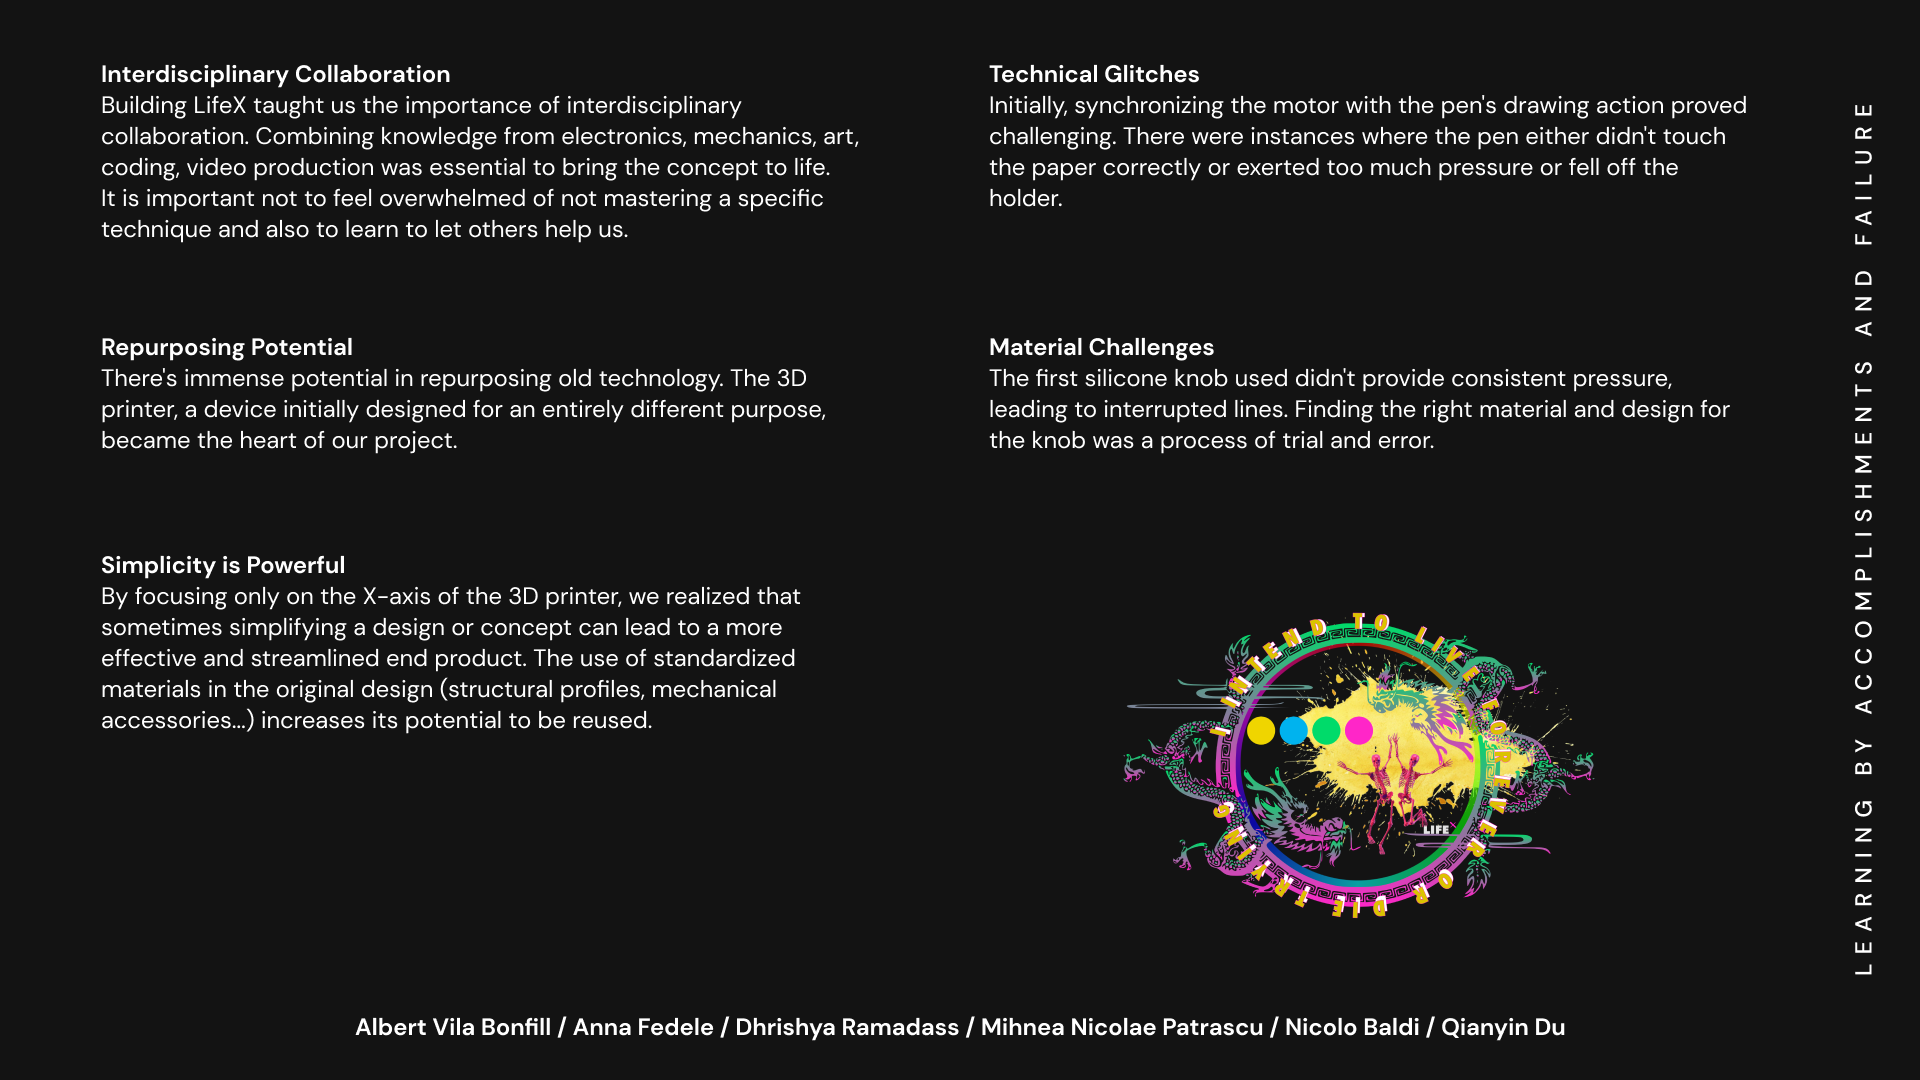
(Almost Useful) Machines
In Week 2 of the 'Machine Paradox' phase, we took our achievements from Week 1 to the next level. While the initial week was dedicated to disassembling and testing individual components, this week presented us with a unique challenge: to innovate and craft a new product using parts extracted from the printer. An intriguing twist to this assignment was the directive to design the machine to be as whimsical and non-functional as possible. This encouraged us to let our creativity run wild and embrace a playful approach.
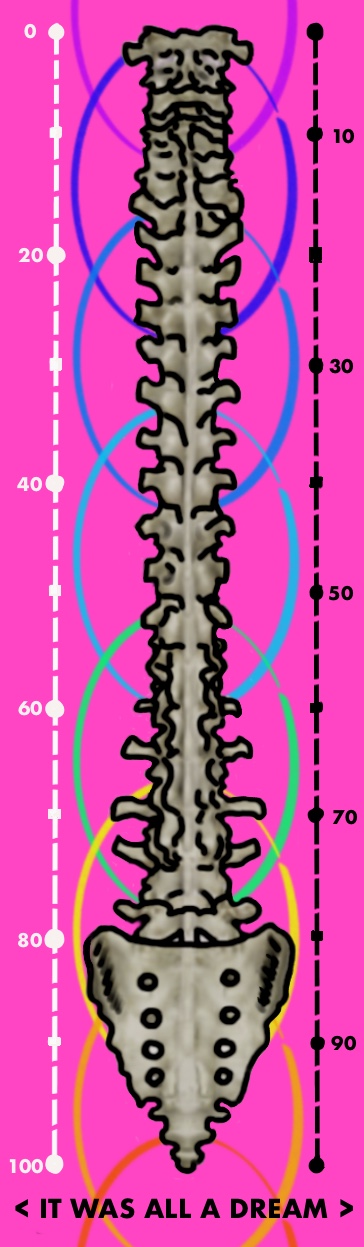
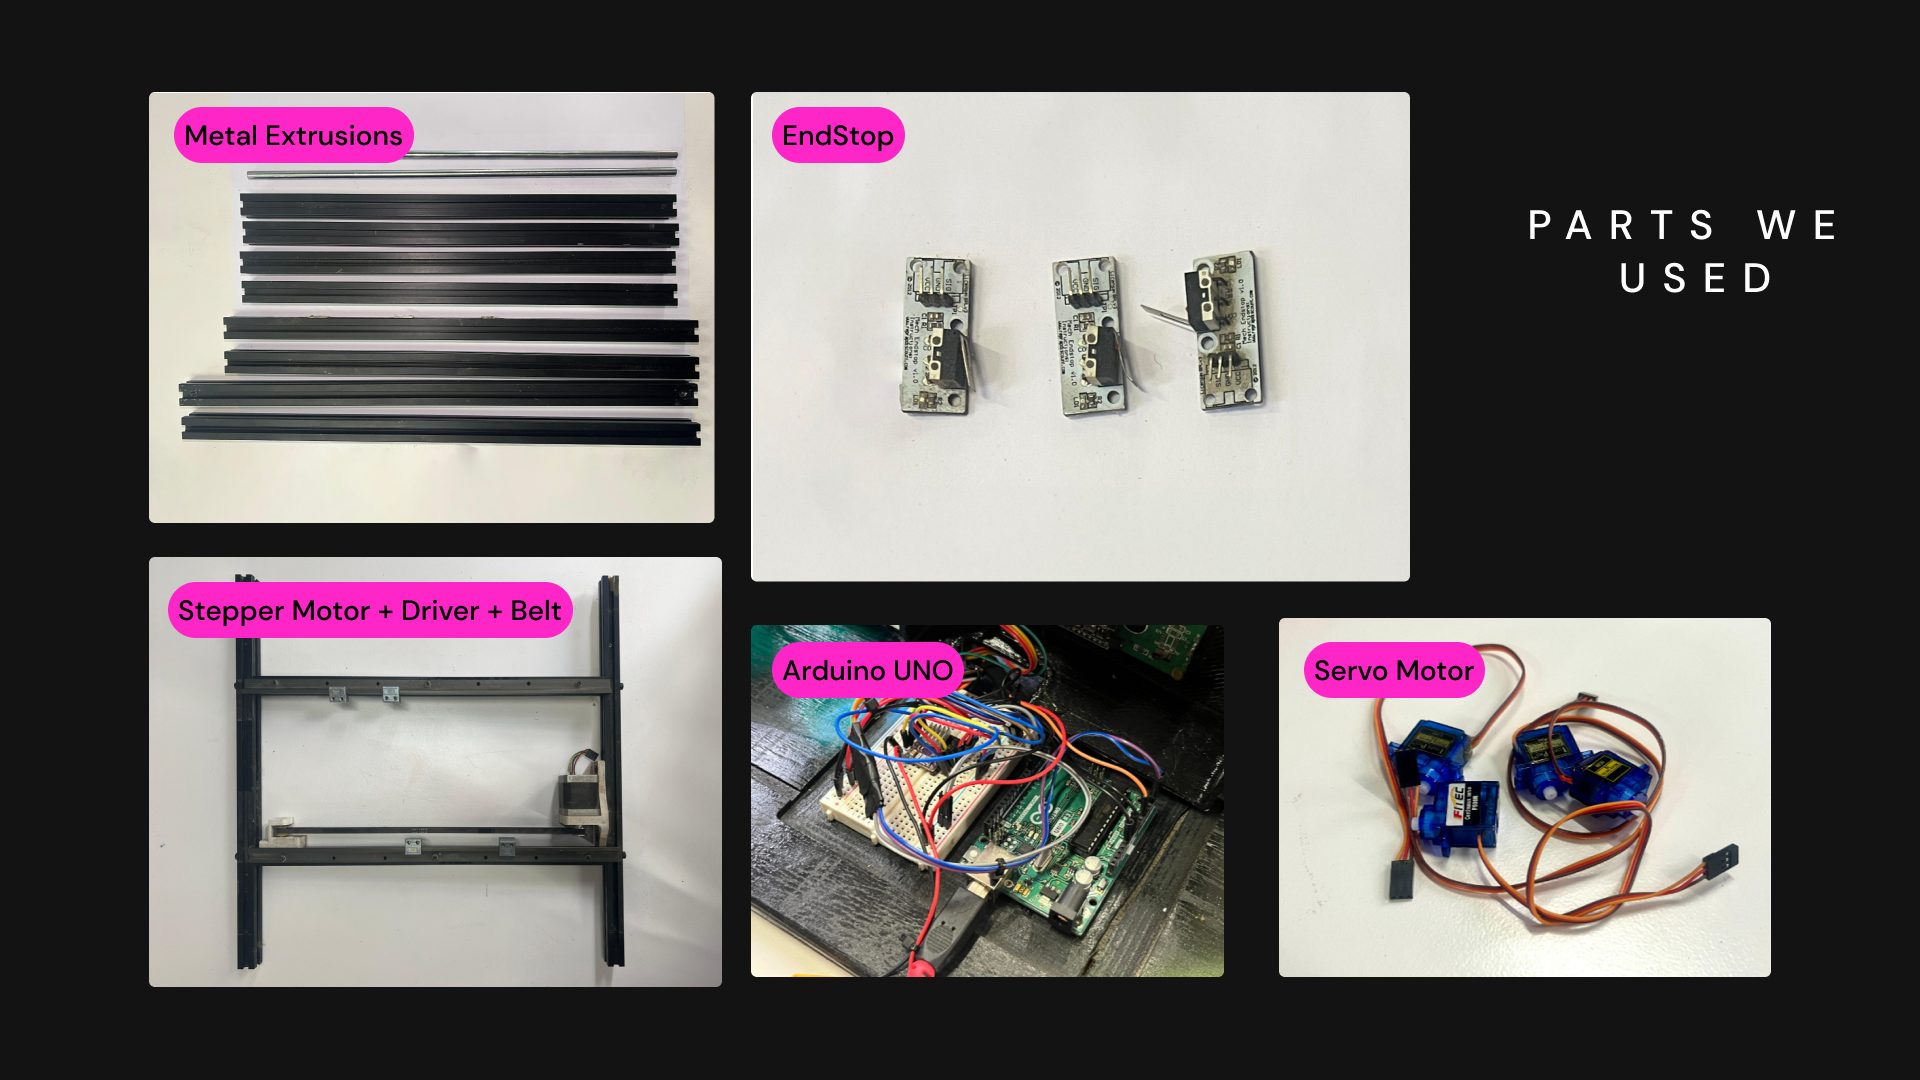
Even with a treasure trove of components at our disposal from the 3D printer—including two motors, an extruder, and more—we embraced an audacious and captivating concept: the LifeX, a so-called 'life expectancy predictor'.
At its core, LifeX uses the X-axis motor and belt system. With a simple push of a button, a pen draws a line on a paper below, supposedly predicting the age at which the user will pass away. It's a tongue-in-cheek nod to the dubious claims of some fortune tellers. In truth, an Arduino board is programmed to halt at a random number, influenced by the moment the user activates it.

Yet again, we've transformed an obsolete 3D printer into an entertaining, albeit purposefully impractical, creation.
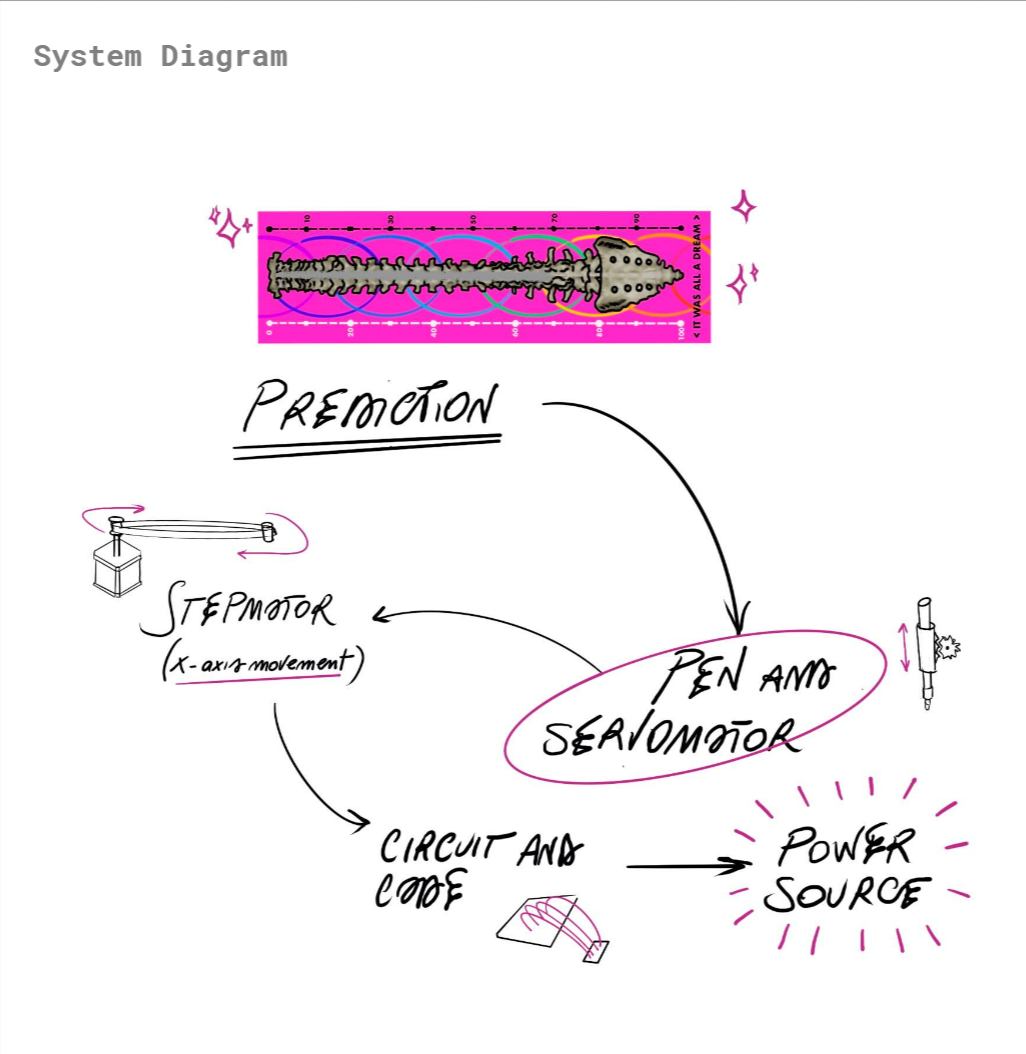
The motor maneuvers the pen across what we playfully dub your 'life bookmark', a creation thoughtfully crafted by one of our talented team members. This ticket, more than just a whimsical prediction, serves as a keepsake from this pseudo-paranormal encounter. Hold onto it and cherish the memory of this unique experience!
We were privileged to be part of a diverse team, boasting a rich tapestry of skills from varied backgrounds. This multidisciplinary blend, from engineering acumen to artistic flair, was instrumental in propelling our project to completion. It was this collective genius that birthed such a unique and delightful machine.
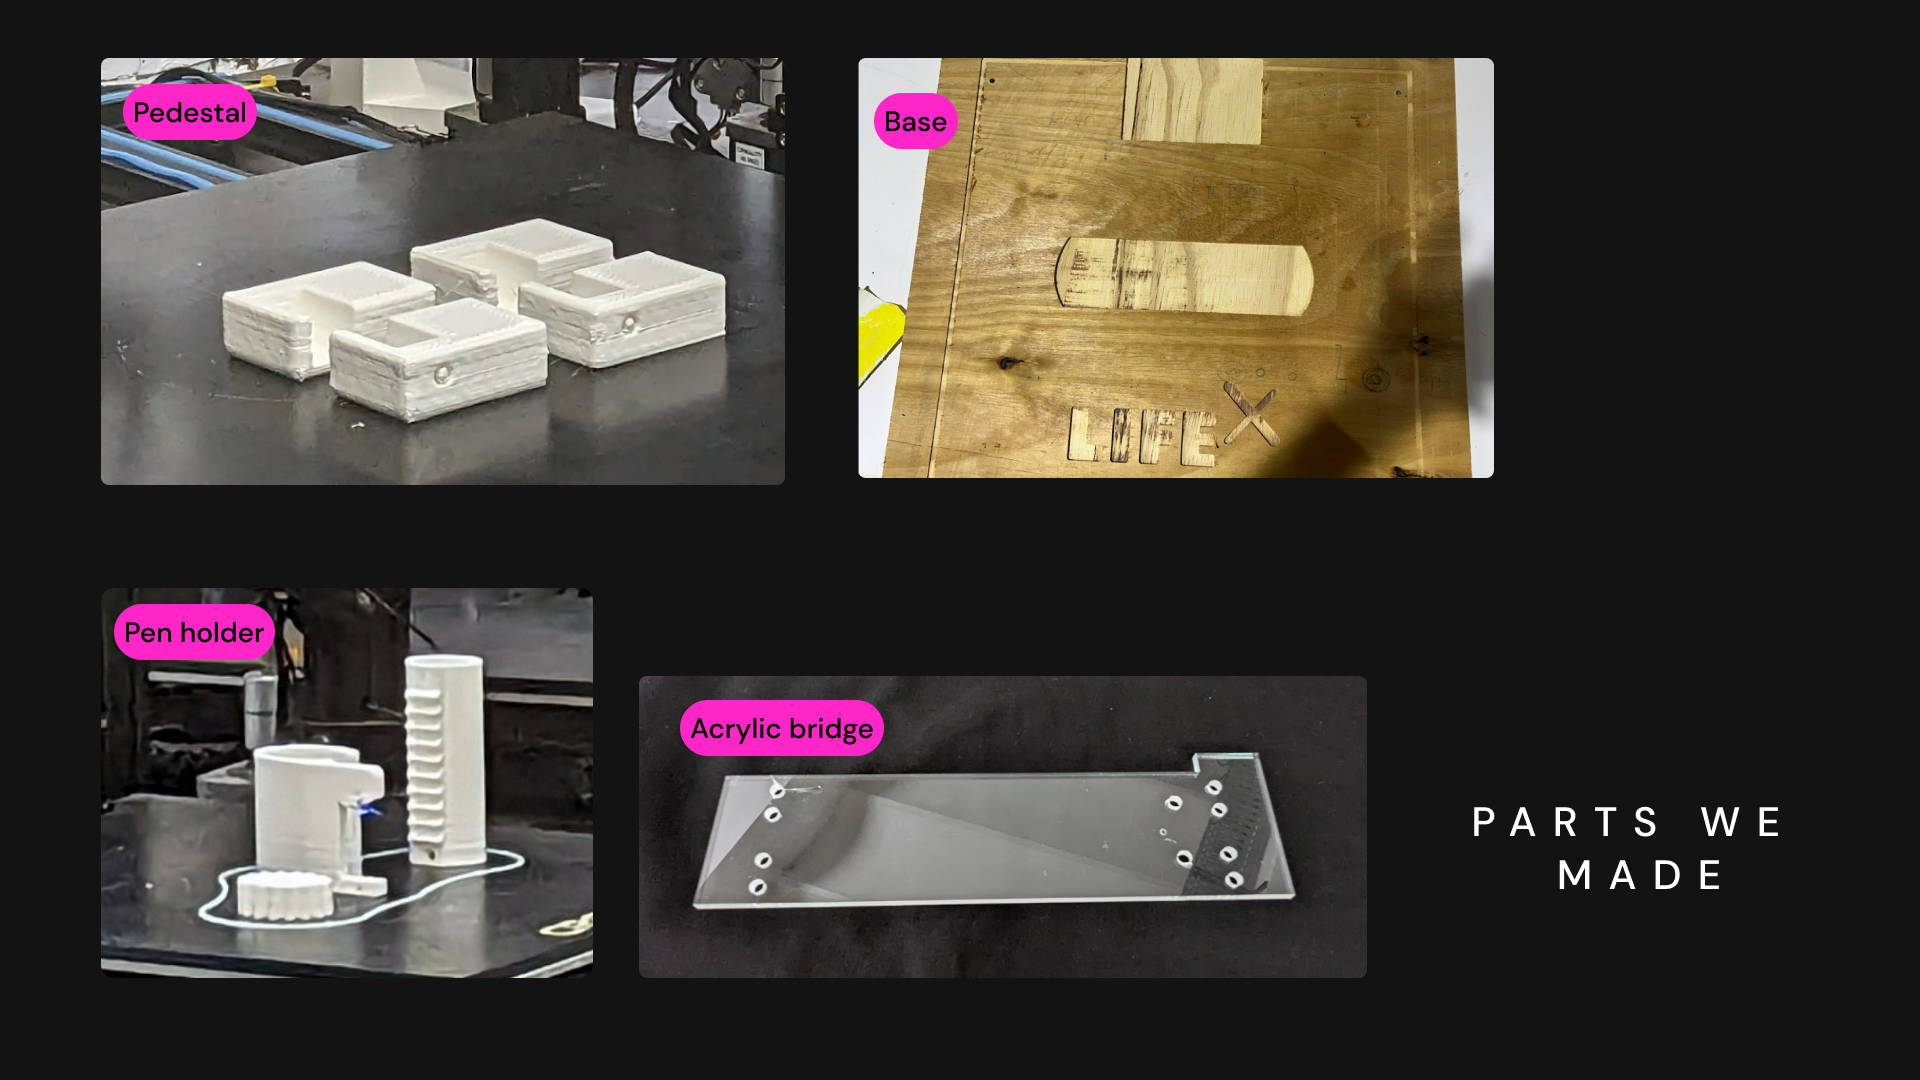
One of the most captivating stages of our journey was the decision-making process regarding which parts to repurpose from the printer and what additional elements we would introduce. We strategically utilized only essential components, complementing them with bespoke pieces crafted through 3D printing, CNC, and laser techniques—thanks to the advanced digital fabrication facilities available at our school.
After assembling all the components, we captured the magic on camera within an impromptu lighting studio set up right in our classroom. Without further ado, check out the video below.
Finally, this project wasn't just about creating a unique machine; it was a journey of growth and discovery for each of us. The challenges we faced and the decisions we made along the way provided invaluable lessons. We learned the power of collaboration, the importance of diverse perspectives, and the resilience needed to transform an abstract idea into a tangible reality. As we reflect on our time together, it's evident that we've not only honed our technical skills but also deepened our understanding of teamwork and innovation. This experience has enriched us, and we're excited to carry these lessons forward in our future endeavors.